I talked about getting a 3D printer for several years. I liked the idea of the freedom of it, and the flexibility of it. Just the thought of being able to design or purchase basically whatever miniature or model I could want, and then print it out in the comfort of my own home, was something that sounded good.
Well, that was, until I read about the vast amount of work that would be needed. Not only would I need to learn some new "slicer" software, but also 3D design software like Blender. Plus I had to start being aware of ambient conditions like temperature and light. Add into that the required equipment for being safe, due to the resin being a harmful liquid, and it all started to seem a bit overwhelming for an ageing mind like mine.
It really did put me off.
But then the day arrived, last October, where the printer I wanted was on a bit of a deal, and I sent in the order. Surely, owning the printer would finally get me to do something with it, right?
Cut to nearly a year later, and I've finally gathered all the bits I need, and at last I'm starting to delve into this new and scary world.
I'm pretty sure I went through the initial stages of the printer's setup back when I bought it. But just to be sure, I did them again.
One of the reasons why I didn't do any printing last year was that we were going into the winter months, and it's a well known fact that 3D printing really isn't something you should do in cold weather.
But as I'd already missed the three week window this year where the UK weather is warm enough to print unimpeded, I thought I'd try something else to keep the resin toasty.
I went for a brewing belt, or fermentation belt, that can be used to help brew your own beer. It's a bit too long, with no way of shortening it, so I've had to fold it back on itself and clip it together. I have no idea if this is something I should be doing, but I can't use it without, so I move on...
When I turned it on, even on high heat, it really didn't feel all that warm in my hands, but it seemed to be keeping the inside of the printer at about 22-24o, so I let it do its thing.
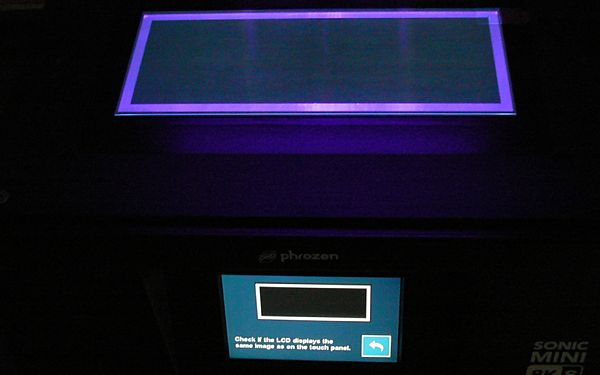
Let there be purple light
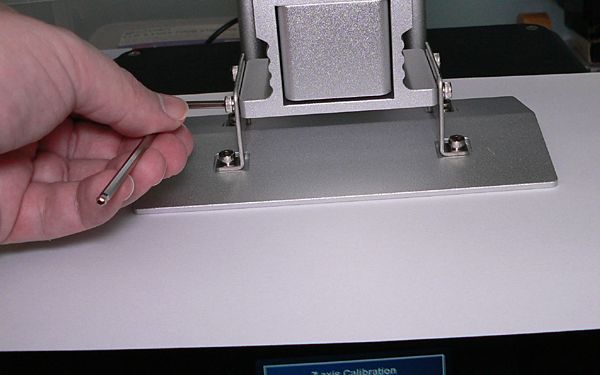
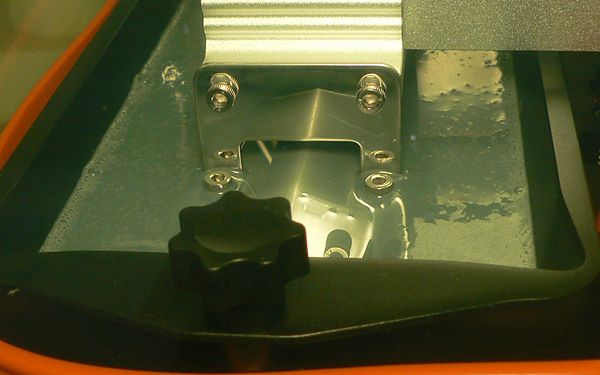
I've found the level now, haven't I?
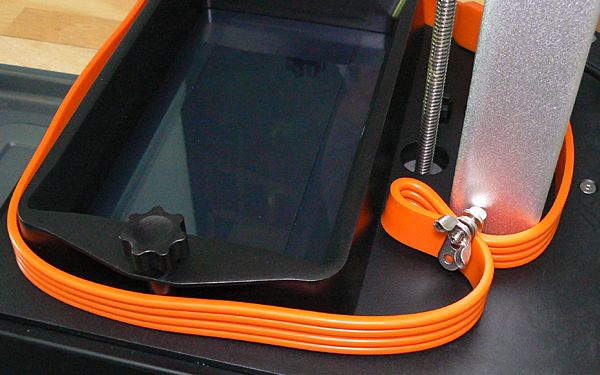
Wrapping it up warm
Now the printer was ready to go, I needed something to print. Sure, maybe I should have done some little test print, or calibration print, but those were boring. I wanted some fun stuff. I wanted action.
So what did I go with? That's right: guns and fists.
Now there are two big steps in getting something ready to print. The first is the models themselves. These need to be imported into the slicer, and set up correctly with supports and the like so that they will properly print on a specific device.
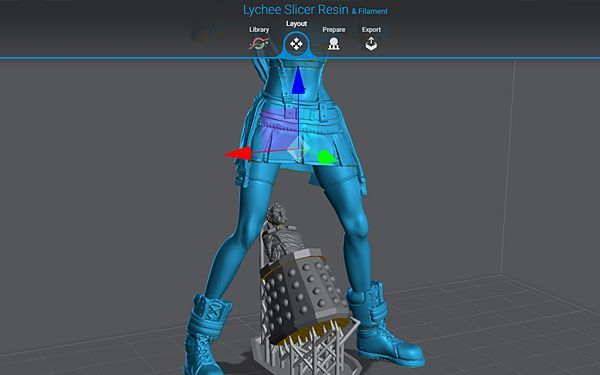
For this first effort, I went with the easier of the two main slicers, which is called Chitubox. Using this is indeed very basic, but doesn't give you massive amounts of control.
But whatever. It was my first print.
The other big part of sending something to print is getting all of the settings correct. These settings can be completely different, depending on what printer and resin you're using, as well as what the temperature is.
There was little to no help for me when it came to these settings. The combination of printer and resin that I was using is clearly not a popular one. There were a few community profiles on the Lychee slicer, but none that had been used much or reviewed at all. So I had no idea if any of them were any good.
There was also some info on the Elegoo website about all of their resins, which I was using, but the information only pertained to their own printers, which I was not using. It didn't help that looking down the list of printers showed me that even using the same resin, all of the printers had completely different settings.
All I could do was take a baseline average, or as close as I could, from all of the different setups that I had found, and enter these into Chitubox. These settings would get exported along with the models when I sent them to the printer, and would tell it things like how thick I wanted each layer, how much UV light exposure to use, plus a load of other seemingly weird but actually very important things.
But I couldn't put it off forever. It was time to get that thing printing at last.
There was some worry at first because the first few layers really pulled on the FEP, making it twang, but when I went back to it later I could still hear it doing this but far less.
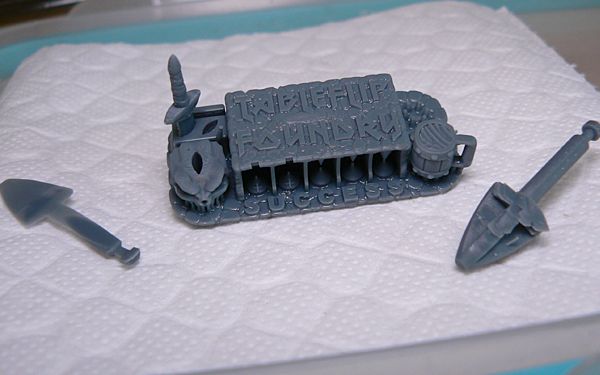
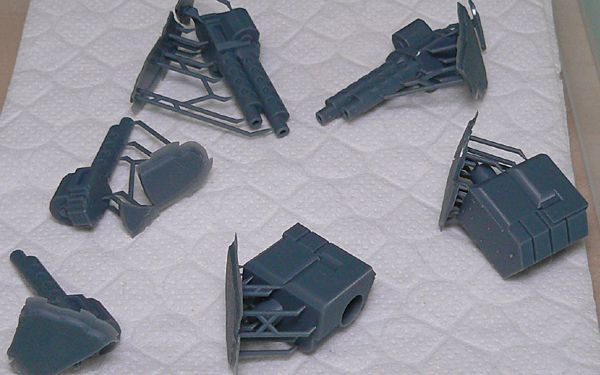
Near the end, when the build plate was finally lifting high enough to see into the vat a little bit, I thought the two smaller guns had failed, because I could only see supports. So it was cool when it was all done, and all six items came out unscathed.
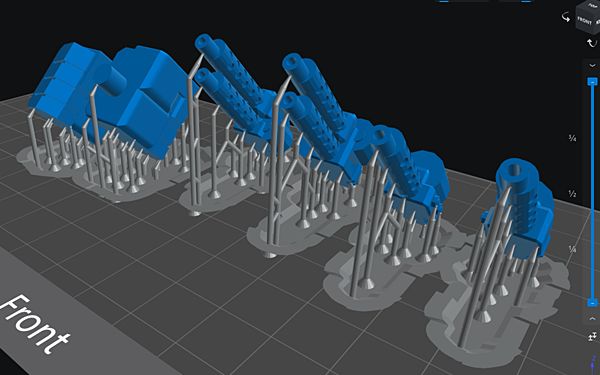
First Chitubox setup.
First dunk. Here goes nothing.
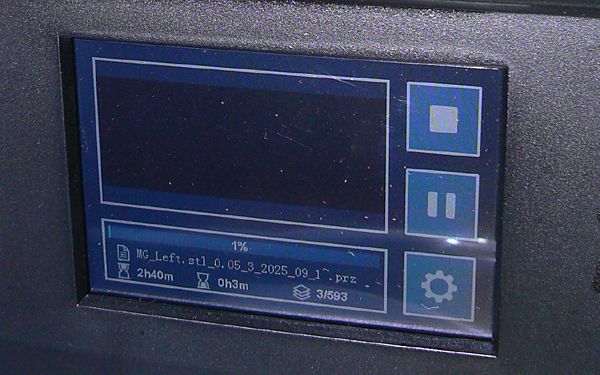
Guess I'll come back in a couple of hours

Holy cow, I got some prints
Then it was onto the worst thing I had to endure during this first effort, and that was scraping the items off of the build plate and cleaning everything up. The IPA I was using for the cleaning stank much worse than the resin, even through my fancy new respirator.
But eventually, they were washed, dried, freed from their supports, and left out in the conservatory for a few hours to properly cure.
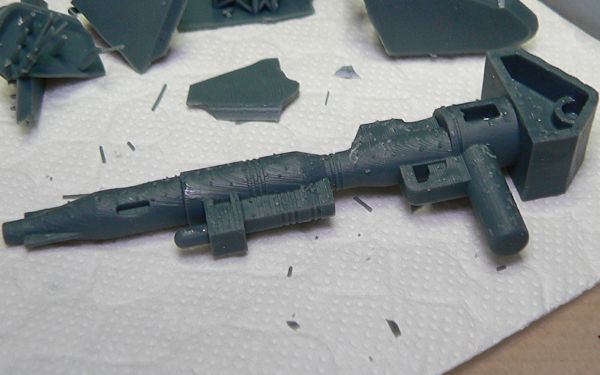
I gotta say, though they still need filing and/or sanding, I think they look pretty good. Sure, I think all of them are way too big for how I was hoping to use them, but I'm happy for a first attempt.
I could tell in advance that the Gaslands guns were too big, so I'd already shrunk them down to 85% in the slicer, but yet they still look huge. I'm not even sure I can use them on the bigger vehicles.
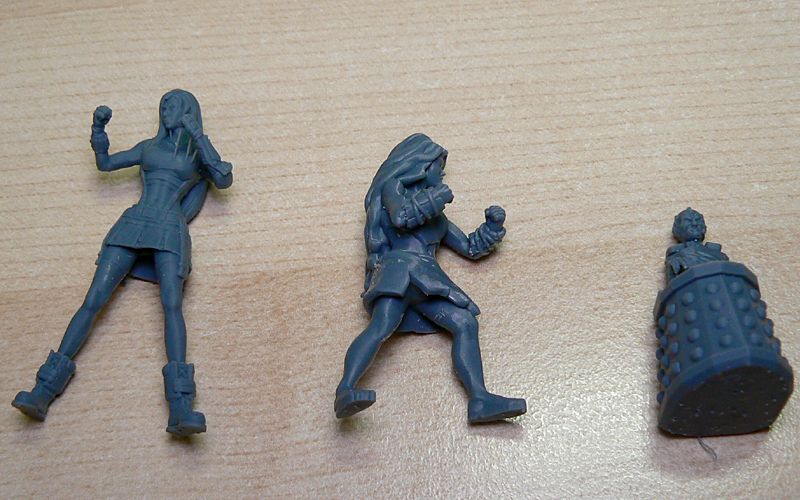
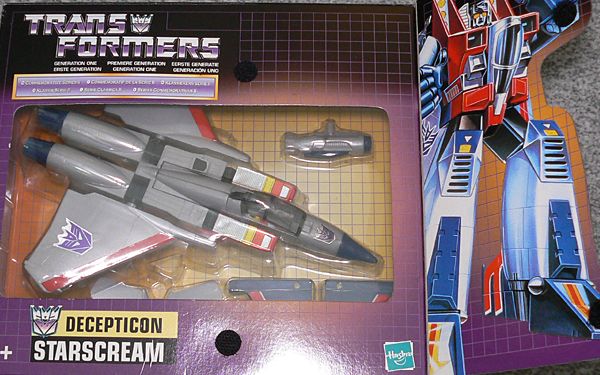
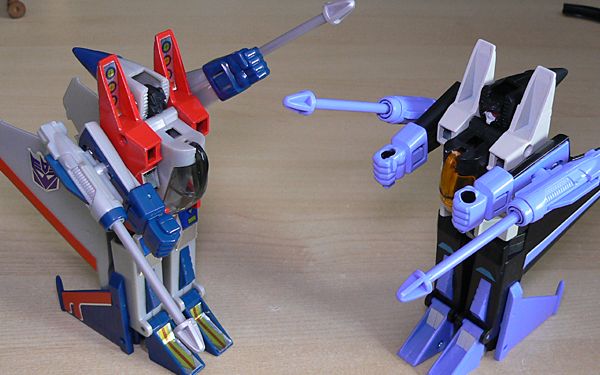
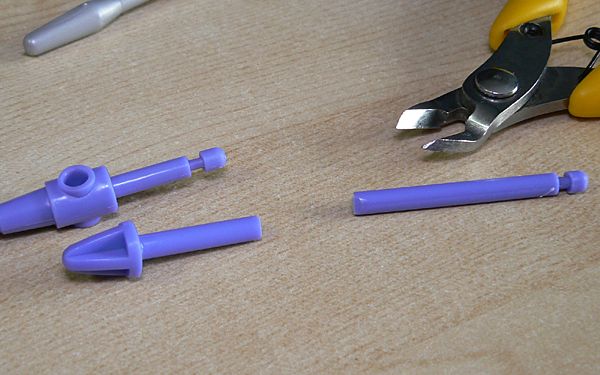
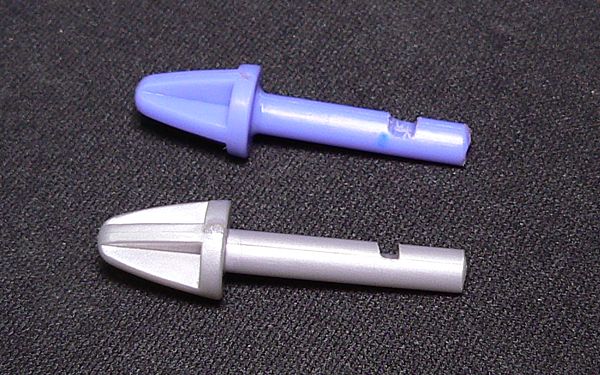
And then there's the new Optimus Prime fists, which I was hoping to use for my new task of renovating some old Transformer toys. You can see the difference against my one surviving Prime-style fist, out of the four I used to own.
It's clear that these things are just comically large. Maybe I could paint them red so it looks like Optimus has got boxing gloves on?
These will have to be edited in Blender, rather than with a simple scale modifier, so that the pins can remain the same size, as they actually fit quite well.
Washed and dried, ready to snipping and curing
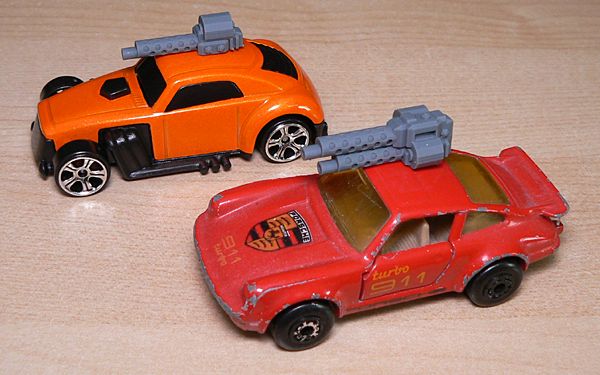
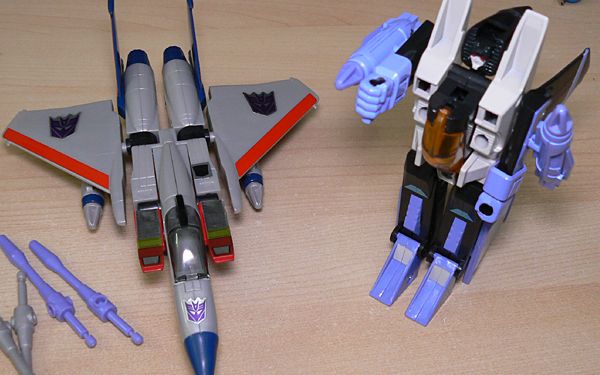
Trying the guns on regular cars...
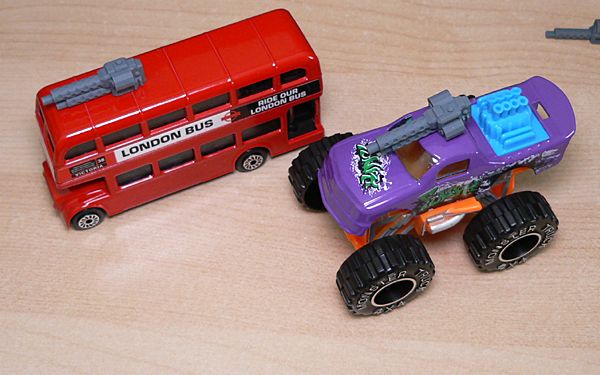
...and on bigger vehicles
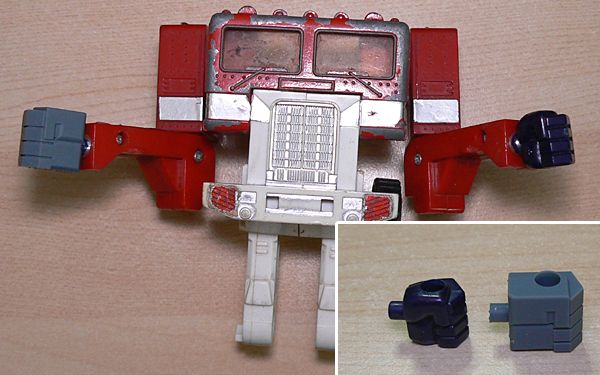
I think Prime is hoping for some extra punching power
I left the remaining resin in the vat as I wanted to try again next day. My plans were scuppered when I decided to switch to Lychee. Now, there's no doubt that this slicer allows you to do many more things, and it even fixes some of the problem files on the fly that Chitubox just didn't want to mess with. But it was much more complex.
Some serious tutorial watching was needed, and so it wasn't until the next day that another print could be attempted. This time, I decided to try some wings, again to replace some missing ones for a Transformer. Following the tutorial (from the official Lychee Youtube channel no less), I created my own supports rather than just use the auto option. This ended up being a massive mistake.
Now, I don't think I massively cocked it up per se, but I clearly underestimated how much it took to pull these prints from the FEP sheet. I'd already tweaked my resin profile, to pull the print slower, and to expose each layer for less time so that it didn't set so hard, but clearly this was not enough for the supports I created.
I set the print to go, which was going to take around eight hours. Luckily, I checked back after about three, to see there was clearly nothing hanging from the support structure. It seems that once the printer had reached the main bulk of the wings, the suction had pulled them clear of the supports.
I then had another torrid time cleaning up, and as I had run out of available printing days for the moment, the resin had to get sieved back into the bottle, and everything packed away.

Trying some manual support shenanigans
Aren't there supposed to be wings attached to those?
So, it's definitely been an interesting first effort, and a learning experience. But more study and prep work is clearly required before I can get much more done.
I definitely need to study supports a bit more, get Blender on the go to fix and scale some of the other models, figure out some more tricks to stop it sticking so much, and try and come up with a more efficient way of cleaning.