Top
↓ Page Down Clear Filters

Latest Page ↑

23rd October 2025: Forty Thousand-S

Now Scoob's game room is ready for some action, we've played a couple of games of our 40K-S rules. It's been quite a while since we've mucked about with them, so it was about time we started to evaluate whether or not it is a rule set that we should keep developing.

Firstly, in a roughly 1800pt game, I rocked up with a very simple Space Marine army, only to have Scoob drop a Stompa on me. Still, I was empowered by cheesburger pizza, so I gave it my best shot.

We didn't have very long to play this game, so only got 2 turns done. Surprisingly, my waves of bolter fire caused some good damage on the Stompa, while the Stompa's guns were less effective than what we would have thought.

But then, while a couple of my other units tried to deal with the Ork Warbikes on the other side of the table, a horde of Ork Boyz charged out of the Stompa and into combat with my Tactical Squads, hacking a bunch down.

I'm guessing things would have gone downhill for me from that point, but we didn't have time to continue this little test.

The Marines stare down the huge clanker

The Marines stare down the huge clanker

Ork Choppy Boyz pour out of the Stompa and into action

Ork Choppy Boyz pour out of the Stompa and into action

A couple of weeks later, during which I spent hours staring at code and spreadsheets in order to improve the army picker, and get more units into the game, we went to war again.

In a roughly 2800pt game, I saw myself commanding my entire current Eldar force, minus Lelith Hesperax, against pretty much all of Scoob's Tyranids.

Now, back when I first started to collect Eldar, I also started to collect Tau, with the idea being that they were going to be allies. Of course, the idea was that the Tau were going to handle the long range firepower, while the Eldar moved onto the board to deal with the remaining enemies at much closer range, and also handle objectives.

An overwhelming amount of Nidz

An overwhelming amount of Nidz

Deep striking creeps outflank the Dire Avengers

Deep striking creeps outflank the Dire Avengers

Unfortunately, with absolutely no long range firepower in my Eldar army, barring a twin Bright Lance on a Wave Serpent, I could only try and kill the Nidz by getting close. And as you may have guessed, being close to the Tyranids is exactly what they want, and my little pointy-eared lads and lasses got their faces absolutely munched on by all those bugs.

By the end of just turn 2, the outcome of the game was pretty obvious, and I called it.

Got to say though, I was very disappointed that we only got two turns done in about 6 hours. Sure, we were constantly discussing rules ideas, and we stopped for a while to fill our greedy bellies with Chinese food, but I was hoping these rules would run way faster than this.

Still more work needed, I guess...

The Psychophage makes a meal of the Phoenix Lord

The Psychophage makes a meal of the Phoenix Lord

Very few Eldar remain

Very few Eldar remain


Way back in February, before I lost access to the work unit for good, I got the Epic Goffs and Evil Sunz set up for their varnish coats.

For all of the metal models, I hit them with a thick gloss coat first, before then giving all of the models their matt spray down.

Glossing over all the important things

Glossing over all the important things

Giving the Orks an 'ardcoat

Giving the Orks an 'ardcoat

There's been no Epic painting since then, except for some sporadic work on my Warlord Titans that I started to renovate back in April.

The Epic 40K metal titan needed the most work on the armour, but because of the design, with all the hard edges, it was probably the easiest to paint.

The old "Beetleback" titans have lots of large and curved armour sections, and I never know how to deal with them at my skill level. I always feel like I should get an airbrush for models like that, but I don't want to spend all that money on a tool I may only use a handful of times.

I decided to once again use some of my many transfers on the two plastic Imperial titans. This time, I made a bit of a cock up when I painted matt varnish over the top of them. I shook the varnish up, then took off the lid and got some varnish from the underside of it, rather than squeezing some out onto a palette. I should have absolutely taken the latter option, as I didn't notice until it started to set that the varnish on the underneath of the lid had started to go a little lumpy.

And now that lumpiness is evident on the models.

Sigh. I mean it's not that bad, but still...

The Epic 40K metal titan was first up

The Epic 40K metal titan was first up

Working on the other Imperial titans

Working on the other Imperial titans

Painting the Slaanesh titan, I completely forgot from when I was painting my black Hive Tyrant all the way back in 2015 that the shitty GW washes can't be thinned with water. So once again I ended up with little white spots in all the recesses, and had to patch things up as best I could. Fucking hell GW. Your washes suck. I mean what kind of water based acrylic paints can't be thinned with water?

At least when I threw on another transfer I didn't cock it up this time.

Getting around to the Tzeentch titan was also interesting, as I was having to finish off a model that I had started an entire 14 years ago.

There were lots of details that I think I was just going to ignore back in the day. But older, more critical me wanted to make a bit more of an effort. I also added bits of paint to the transfers to hide how bad they had gone down back in the day. It's not ideal, but better than it was.

Risking more transfers

Risking more transfers

Trying to improve on a 2011 paint job

Trying to improve on a 2011 paint job

I did actually finish these models yesterday, but I'll wait to snap piccies until their respective armies are also done.

Which might be a while...

29th September 2025: Another Quest

I recently got asked to make my debut in Scoob's new gaming room.

With the official 40K rules really not taking our fancy, and our rules not ready for any games yet, Scoob put forward the idea of trying One Page Rules again.

This time, he fancied trying the co-op game Star Quest, in which you make a few characters, and send them onto the tabletop in an attempt to meet some random objectives.

Neither of us knew much about the rules going in, so there was a lot of reading and head scratching as we were setting up.

All I'd read going in is that the game usually kicks your ass all up and down the board, and that certainly happened here.

We'd got to make our way over the board, which took 6 turns, then hold an objective for 6 turns, then make our escape at any corner of the board.

In the early stages of the objective-holding portion of this mission, as the second wave of enemies came swarming in, it became very obvious that we were not going to succeed. Our characters, which included my Guard officer, The Wolf, and Scoob's Ork, Gitface, were heavily wounded, highly stressed, and still surrounded by survivors from the first wave of enemies.

We decided to call it there, and I think we were both left a little unsure of the ruleset. It's certainly got its good elements, and we will know a bit more about how to create better characters going forward, so it might be worth playing again.

But ultimately, for me, it was a message that I need to get my finger out of my ass and get those 40K-S rules fully up and running.

The mission commences

The mission commences

Gitface charges into more enemies

Gitface charges into more enemies

Helping the Ork squish some bugs

Helping the Ork squish some bugs

12th May 2025: Easy Treesy

My terrain making marathon has been continuing, with my attempts to finish off my new forests.

For my scratch-built trees, I knew I needed some different coloured flock, so I tried to mix in other colours to my existing flock, to see if I could stain it a different colour.

This worked to a degree, but did not give me the bright, vivid colours I was hoping for.

Nevertheless, I trudged on, and attempted to apply this flock to the trees, by using that thinned down PVA I'd got left over in a squirty bottle from my board build.

I made a huge mistake when I came to glue on the 2nd layer of flock. This took place outside on a breezy day, and a huge gust of wind knocked over my pots of flock and scattered them across the decking. I'd only done the 2nd layer on about 4 of the trees, and I rolled my eyes at my stupidity.

However, it seemed multiple layers probably wouldn't have helped these creations much, as the flock would fall off with even the lightest touch or movement. So several days went by where I blasted those things with more PVA to try and seal them down, as well as one day where I emptied most of a rattle can of varnish over them.

But still the flock barely holds on.

Paint meets flock

Paint meets flock

Starting to flock the trees

Starting to flock the trees

Pegging my trees out to dry

Pegging my trees out to dry

To give me some backup in the tree department, I found a cheap bag of toy trees online, that are very cheesy indeed, but came in a wide range of colours and sizes. Just what I wanted.

After several days of monotonous effort, I think I've been able to create a bunch of interesting looking bases with which to form the forests with.

Sure, some of them look better than others. And sure, some of those toy trees, as well as the fish tank plastics, look pretty low effort if you focus on them too much. But I still think they look a lot better than my scratch-built abominations. That's why I barely ended up using any of them.
All that mucking about for nothing. Again.

So while they certainly aren't perfect, as a whole, I quite like the effect.

Overall, I think they will be adequate for our needs, and are far better than the old ones, for both playability and storage.

The grass applicator gets another run out

The grass applicator gets another run out

Epic trees all done

Epic trees all done

Tyranids stalk through the new 40K trees

Tyranids stalk through the new 40K trees

30th April 2025: World Of Boardcraft

Another few days were on the horizon where I would have the time and space to work on my gaming boards again. And this time, I decided, I needed to make it count. It was about time these damn things were done.

Before I could finish off the boards I'd already started, I needed to go back to one of my old boards and modify it so that it would fit in with the new ones.

I peeled off some of the old grass sheet from down one long edge, and along one of the short edges where it had crinkled when I first glued it down many years ago.

I'd got one pre-cut strip of MDF left from last year that I glued and screwed down along the edge. Then I cut and attached some slightly thinner wood and some XPS to go around the corner. That wood was actually my old cutting board that I used for years before finally buying a proper one last year.

I then added a few little bits of wood and card to form the foundation of some "ramps" that would slope down from the high edge to the center of the board.

And then I went absolutely mental with home made modelling compound to try and blend everything together. Not sure whether it was a good idea, but I mixed in paint to the compound as I made it, so that it would have a more natural colour, in case anything on top of it got scratched off.

Living on the edge

Living on the edge

Give 'em the clamps

Give 'em the clamps

This compound is from the swamp

This compound is from the swamp

These ramps look weird

These ramps look weird

My first problem arose when I saw that I must have put too much water in the compound. Not only did it take way longer to set than last year, but a lot of the moisture must have absorbed into the MDF trim I'd screwed to the board. This meant it warped and expanded, and I had to do my best to correct it with filler and sanding.

The white filler pretty much covered all of my coloured compound anyway, so I slapped some paint all over the top of it.

Next up was the grout, and after gluing this down, I saw a big complication. I'd lined up one of the new boards against this one, to check the height. It was at this point, to my absolute dismay, that I realised that the new boards had warped pretty badly. The thinner ones were even worse than the wider ones, with the river section having what must have been a half inch upwards bend on it.

I guess it was either the layers of glue and paint that had gone down, or just the fact that I bought naff wood all the way back when I started. I felt so shitty and demoralised. All this time and work. And seemingly for nothing.

Maybe I screwed myself over by wanting to have some of the elements, like the river, sculpted into the board.
I should have just painted the boards green/brown, then put the grout mix over the top, then the flock and grass with basing glue. Then just use modular terrain, even for things such as the river.

Maybe if I'd stuck to the simple stuff that works, I wouldn't be in this mess.

I came to the decision at this point that these boards were not going to be the awesome gaming boards I'd always wanted, and that I would have to make some more at some point (preferably as soon as possible).

But I needed to decide whether to pull the plug now and save all my grass and glue, or see it through and see what other fatal mistakes I could make, and what valuable lessons I could learn.

I decided for the latter, and after some failed attempts with fulcrums and weights to see if I could flex the boards back into position, I went ahead with the basing glue and grass.

Filling in my compound errors

Filling in my compound errors

Not mucking about sealing this grout

Not mucking about sealing this grout

One of these boards is not like the others

One of these boards is not like the others

Flocking it up good

Flocking it up good

I'd got five full 50g bags of different shades, and another two half bags of random leftovers. I stuffed them all together in one big bag, and confidently decided that there was plenty for this task. That was, until I did my first couple of test corners, which seemed to gobble up the grass.

I'd bought two massive bottles of quite expensive glue, thinking this was the thing I was going to run out of, but instead, it seemed like the grass would be the problem.

Just in case, I thought I should only put grass around the edges of the boards, to make sure they would all fit together. And then, if it looked like I would run out, I could mix any new grass in with my leftovers to blend things in a bit better.

This proved to be yet another mistake. After trimming the first board, I got a bit more confident, and thought I'd have enough after all. Sure enough, I slapped grass down on the other boards no problem. But when I went back to the first board to finish it off, it ended up leaving a very obvious seam between the outer grass and the inner grass. And it's very unsightly.

Oh well. It's not like there aren't a load of other things wrong with these boards. What's one more?

I missed a bit

I missed a bit

Getting that grass down

Getting that grass down

The final stretch

The final stretch

Some hefty varnish passes required

Some hefty varnish passes required

After the grass was all down, it was out into the sunshine, or rather out into the shade, to slap down some hefty varnish passes from some rattle cans.

Now, there are still plenty of little things to finish off. The dirt areas need touching up with some drybrushing. The river needs re-painting. Some edges need tidying up. Things like that.

But ultimately, the boards are now playable. I can finish them off properly at any time, so that's what I'll do. Right now, it's game time!

The final boards find a shady spot to cool off

The final boards find a shady spot to cool off

Only snagging remains

Only snagging remains

It's been just over a year since I decided to make my own boards, and they're only just now in a state where games can be played on them. Shit, I move slow.

23rd April 2025: A Titanic Task

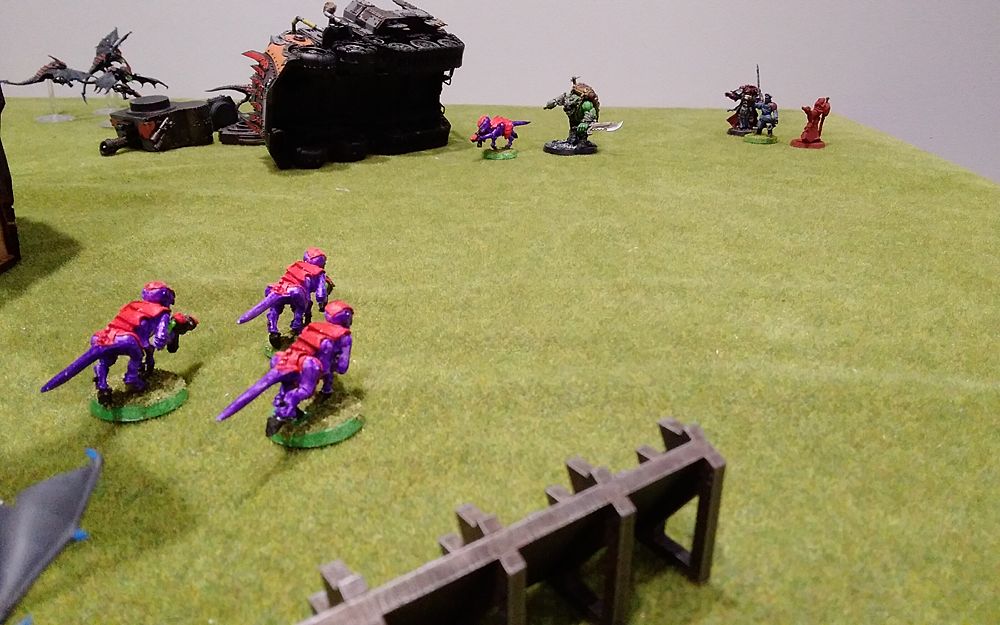
I knew I couldn't keep painting Blood Bowl stuff forever, so I looked to some other games for my next project.

There's so much to choose from, as I have so many unpainted models (1291 at current count, and 321 that need revisiting at some point because they suck).

With me hopeful of getting my new Epic rules to the tabletop again some time soon, I thought some more 6mm action would not be a bad shout. From there I soon saw what I wanted to tackle next - my Warlord Titans.

Ideally, I would be painting my Imperial Warlords along with the rest of their Titan Legion, in order to get them all done in one go.

But I also had 2 Chaos models to go with the 3 Imperial models, and all of them were in various stages of atrociousness, and needed work before I could even think about painting.

The starting point for this project

The starting point for this project

Tzeentch Titan "Zul-Belmanar"

I actually started painting this 14 years ago, and at the time, I got it to an almost finished state.

However, it has remained in that state all this time, as I always assumed I'd finish it off when I got around to painting the rest of my Epic Tzeentch.

This clearly has never happened, and now with my more critical eye and opinions, I came to the conclusion that more was needed than just finishing the paint job.

Firstly, I painted some matte varnish over the transfers I'd used. This technique worked well on the dwarf Blood Bowl team, so I used it again here. And boy did they need it, as those transfers went on bad. And to be fair, they still look pretty bad, with some air bubbles underneath.

Then it had a snapped banner pole which I removed, and filled in with some milliput, as well as taking off a few bits of flashing that had survived.

It is now ready for whatever new paint ideas I can come up with.

Changing things on the Tzeentch Titan

Changing things on the Tzeentch Titan

Imperial Titan "Mortem Dantis"

This is the Epic 40K era metal Warlord Titan, and the only Warlord I own that is not one of the old plastic beetlebacks.

Not only had several bits fallen off, it also still had lots of little bits of flashing do be rid of. Flashing seems to be something I didn't deal with very well back in the day.

I had to glue the large top armour piece back on, though I noticed there were lots of gaps between this and the main body. To remedy this, I decided I would use some milliput. However, before I got messy, I thought one of the top guns looked a little naff, so snapped it off and repositioned it.

After mixing up some milliput, I re-attached the lower weapon using a combination of super glue and putty, to hopefully really solidify the joint.

Then I made a massive mess with the milliput, which took a lot of cleaning up afterwards. Luckily, this doesn't seem to be that bad now that I've brushed some new black paint over the model, which not only covered the new yellow putty, but also patched up the really bad spray undercoat attempt I had done on it years ago.

It is now ready for the Legio Distor paint job.

That carapace needed some work

That carapace needed some work

Re-arming a carapace weapon

Re-arming a carapace weapon

Imperial Titan "Tigurius Finis"
Epic 40K era Tigurius

Epic 40K era Tigurius

This poor titan has seen a lot of action over the years. The legs, body, head and base of it are my original Warlord Titan from the 1992 Epic Space Marine starter box, and it was originally painted blue, grey and red.
After the release of Epic 40K, the carapace and weapons were removed, and it was re-fitted with a weapon set to fit that new game. While it also needed repainting, for some reason I chose the same colours as my Space Marine Chapter, the Storm Tigers.

At some point during the 2000s, maybe when I started to create my own Epic rules, but certainly when it was clear I was never going to play Epic 40K again, I removed all of its weapons and re-fitted it again.

And that's the way it has remained, all of these years, just waiting to get another paint job in the colours of the Legio Distor, my Titan Legion.

At first, I couldn't remember its original loadout except it had the quake cannon which is now on one of my Reaver Titans. But when I paid more attention to the current model I saw both the plasma weapon and the laser cutter still had the model's original paint job. Odd that they are now two of the weapons that have been returned to it.

Speaking of the plasma cannon, it was loose and fell off while I was cleaning up many little bits of flashing that still existed on the model. I took the opportunity to reposition it and tidy it up with milliput.

In addition, I clearly never glued the legs in correctly to the base, as there were huge gaps here, so I also filled these areas with putty. I had an absolute 'mare of a time with milliput during this whole project, as time and time again, it would stick to absolutely anything else but the model I wanted it to stick to.

It really should have received a damn good stripping before any more paint, but I'm well beyond the desire to do any more of that nonsense.

Holes need plugging

Holes need plugging

Its ankles aren't so weak anymore

Its ankles aren't so weak anymore

Imperial Titan "Ignis Variat"

Thankfully, this thing didn't need much cleaning up. There were just a few little bits of flashing, and a tiny bit of what could have been old paint or glue that I scraped off with a knife.

I did have a look at those lower two weapons, and thought they looked in a silly position. If I'd still got some old titan weapon mounts I may have tried to move them to look a little cooler, as the titan looks a bit derpy as it is.
But without any suitable parts, and eager to make this process as fast as possible, I left the weapons where they were.

I did brush over another thin coat of black, as the undercoat I'd put on it about a year ago hadn't gone down as well as I first thought.

Prepped and ready for paint

Prepped and ready for paint

Slaanesh Titan "The Onyx Voluphedon"

This was the last Warlord Titan I started putting together a few years ago, with the main body being from the Banelord Dave gave me over ten years ago now. The carapace on this thing was actually from my original Warlord Titan from 1992, which got ripped off its original model when Epic 40K was released.

It didn't really need much work to get it paint-ready, just a little milliput to smooth over the Imperial Aquila area on the carapace, and a little touching up of the grey undercoat here and there.

I doubt this titan will look this boring when it's painted

I doubt this titan will look this boring when it's painted

↓ Page Down Clear Filters

Latest Page ↑