Top

Warhammer 40K Battle Report Archive

This page contains all of the Warhammer 40K battle reports that were on the previous site but not in the tabletop blog.

Click on any of the following to get taken to that report:

Space Marines Vs Necrons Vs Orks Space Marines Vs Necrons Vs Orks Necrons Vs Orks Orks & Necrons Vs. Mixed Allies Orks & Space Marines Vs. The Alliance Necrons Vs Space Marines Orks & Tyranids Vs. Space Marines & Tau Imperium Vs. Chaos & Orks & Necrons Space Marines & Tau & Eldar Vs. Chaos & Orks & Necrons Imperium, Eldar & Necrons Vs Tyranids Necrons Vs Space Marines Vs Chaos Imperium Vs. Orks, Chaos & Tyranids Space Marines Vs. Space Wolves Space Marines & Space Wolves Vs. Orks Imperial Guard Vs. Orks Imperial Guard, Space Marines & Chaos Vs. Tyranids

12th April 2009

Space Marines (JIK) Vs Necrons (Gallear) Vs Orks (Scooby).
Warhammer 40K 5th Edition. 700pt armies.

Scenario
Kaloris Campaign, Battle 1: "The Awakening"
Almost a year has passed since the Waaarrrghhh! of Ork Warlord Gorrbag Smashgrot first invaded the Kaloris system. After initially losing several of the habitable planets to the tide of greenskins, the Imperial Guard defenders of the Kaloris Stone Legions managed to halt the Ork advance on the jungle planet of Kaloris Secundus. Now, with badly needed reinforcements from the Second Hand and Storm Tigers Space Marine Chapters, the warriors of the Imperium seek to hunt the Orks down and reclaim the system in the name of the Emperor.
A recent Ork attack on the city of Khalact on Kaloris Secundus has been halted and the Orks sent fleeing into the nearby forests. A small Space Marine force is hot on the heels of a mob of survivors when they make a terrifying discovery - Necron warriors setting forth from an ancient tomb buried beneath the cliffs. The war brought to this planet by the Orks must have awoken them from their millennia long slumber.

Before the game, I typed up some instructions and gave these to the players in secret, so that they each had hidden objectives. The instructions were as follows:

Space Marines
Requirements: At least 1 Troop choice.
Restrictions: You may not use Heavy Support. You may only have a maximum of 1 HQ choice and 1 Elite choice.
Objectives: The Orks are no longer the main threat. You must try and slow down the arrival of the Necrons by destroying the entrance to their tomb. This is done by moving a model to the entrance of the tomb and using grenades as if you were attacking a stationary vehicle (so you automatically hit). The entrance to the tomb has an armour value of 10, and a glancing or penetrating hit will automatically succeed in destroying the entrance. Secondly, it is important somebody survives to pass on information about the Necrons. Try and have at least 1 model left standing at the end of the battle.
Special Rules: As the Space Marines are meant to be hot on the heels of the fleeing Orks, it makes sense that they may not use the infiltrate special rule. Units may make a scout move as normal if they are able. Deep striking units are allowed as normal, as the Marines would already have been using them to help hunt the Orks.
Necrons
Free Unit: You have a free unit of 3 Scarabs for this battle. This unit may be increased by spending points if you wish, and it does not stop you choosing another Scarab unit.
Requirements: At least 1 Troop choice.
Restrictions: You may not use Heavy Support. You may not use a C'tan. You may only have a maximum of 1 HQ choice and 1 Elite choice.
Objectives: Your Necrons have started to awaken, and they need power. Thousands of years ago, a Necron power node was constructed near to this tomb. It has now been buried by the thick jungles and you need to find it. It could be buried beneath one of the hills, or hidden in one of the areas of forest terrain. Only Scarab units can search for the node. To do this they must enter the terrain piece (beware as entering forests is dangerous to Scarabs). You may roll to search any terrain piece that contains Scarabs at the end of your movement phase. Each area of terrain may only be searched once, and a search is successful on a roll of 4+. If the node has not been found yet when you search the fourth and final terrain piece then the search is automatically successful. When you have found the node it will be placed in that area of terrain and it is then considered activated. You must now try and protect it for the remainder of the battle. It has an armour value of 10 and is considered stationary. Glancing or penetrating hits will automatically de-activate it. Of course, the enemy will not know what this is and may not even think to attack it.
Special Rules: Any Necron unit is classed as fearless when in its own deployment zone as it stubbornly defends the tomb entrance.
Orks
Requirements: At least 1 Troop choice.
Restrictions: You may not use Heavy Support. You may only have a maximum of 1 HQ choice and 1 Elite choice.
Special Rules: Stumbling upon the Necrons has confused the poor fleeing Orks. At the start of the Ork 1st turn, roll a D6 for each unit. On a roll of a 1 or 2, that unit can not be used this turn as the Orks scratch their heads and try to decide what to do. This roll does not need to be made for a HQ model (or any unit it has joined). For purposes of falling back, the Orks use either side edge to fall back to, whichever is closest at the time.
Objectives: After some initial confusion at having their escape route blocked by the awoken Necrons, your Orks make up their mind to stop all this runnin' and start puttin' the boot in! As your force is now surrounded, they become determined to go down fightin'. Don't let these stupid Oomies and Nekrunz have their way. Make a nuisance of yourself and try and stop them doing whatever it is they looks like they is trying to do.
Test Multiplayer Rule
You may shoot into close combat that does not contain your own models. For each shooting hit scored roll another D6. On a roll of 1-3 it hits one opponent's models, and on a roll of 4-6 it hits the other opponent's models. You may wish to modify this roll depending on how many of each opponent's models are involved in the combat. For example, if 10 Orks are in combat with 1 Space Marine and the Necrons fire at them, the hits might only hit the Space Marine on a 6, and on a roll of 1-5 they hit the Ork unit.
End Of The Battle
The battle lasts a maximum of 6 turns, or until it is obvious how the story has played out.
Deployment
Deployment Zones

Deployment Zones

The Necrons set up first, and may be set up within 12" of the tomb entrance. The Orks set up 2nd. They set up anywhere on the board, but may not be set up within 6" of the Space Marine or Necron deployment zones. The Space Marines then set up, and may be set up within 8" of their table edge.
All 3 players roll to see who will take the 1st turn. The winner decides if they wish to go 1st, 2nd or 3rd. The player who rolled second highest then can choose between the remaining 2 options.

Battle Synopsis

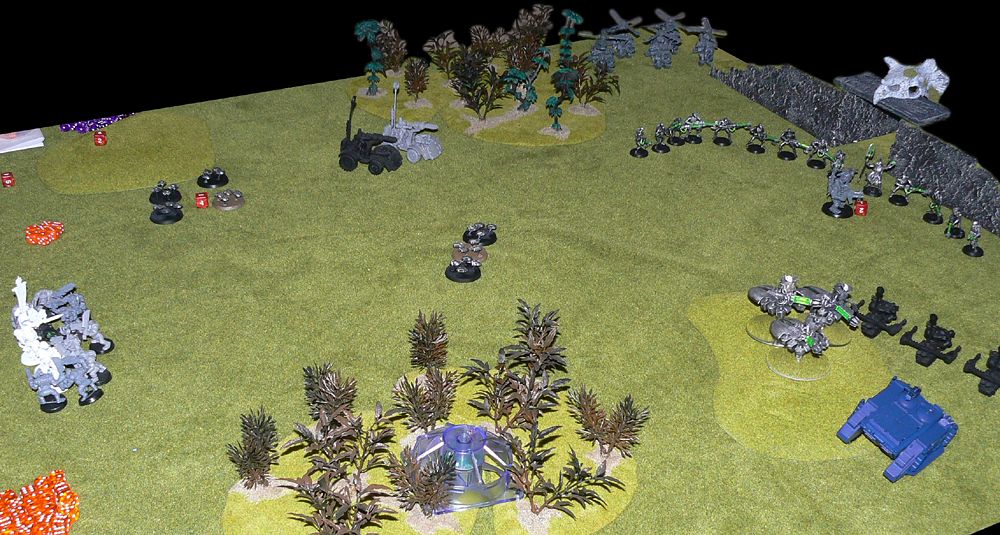
The Space Marines launched an attack down their right flank using bikers and a Rhino containing Assault Marines. Their Tactical Squads in the center of their lines prepared to attack the Orks, and they brought an orbital bombardment down on the Necron forces guarding the tomb entrance.
The Ork Warbuggies and Deffkoptas refused to act at first, baffled by the appearance of the Necrons, but other Ork units surged onto the offensive. Ork Boyz charged into combat with the Space Marine Tactical Squads, while Bikeboyz and Nobz made a move for the Necrons. The Necron Scarabs set out at top speed, and soon found their buried power node hidden amongst the trees to the south east. To distract their enemies from this discovery they continued to scurry around the battlefield and harass anything they could. The other Necron forces decided to make a backs-to-the-wall stand at the tomb entrance rather than move out and protect their power node.

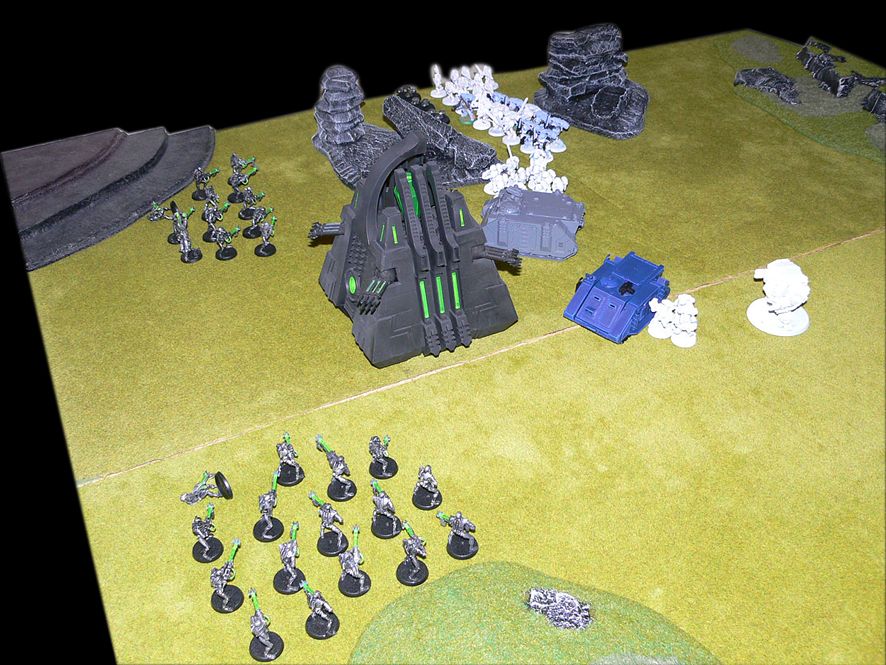
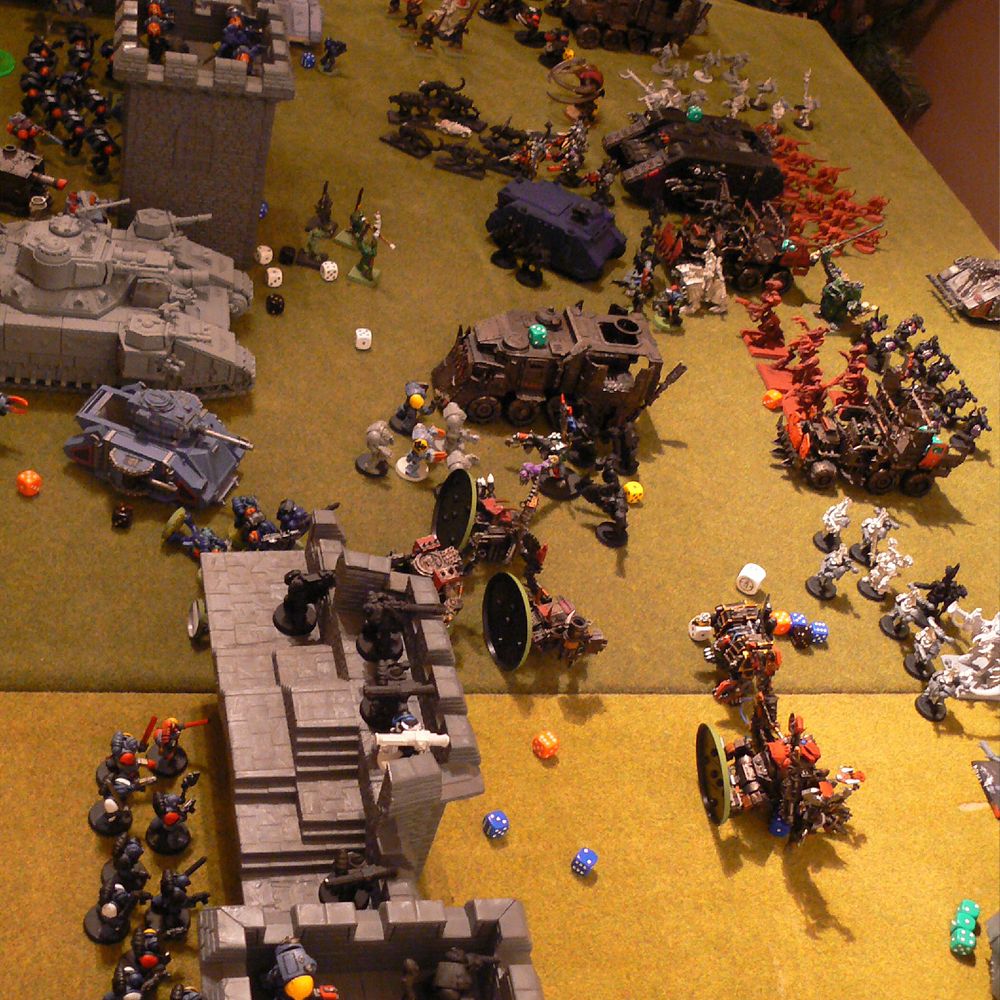
Space Marines and Orks bore down on the tomb and a 3-way fight for the area ensued. Ork Bikeboyz gunned down scores of enemies, but the tough Necrons re-assembled themselves again and again. The Bikeboyz were eventually tank-shocked into submission and they fled as the Assault Marines leapt from the Rhino in an attempt to plant their grenades at the tomb entrance. The staunch defence of the tomb continued and the Space Marines and Orks were all eventually turned away.

The 3-way fight rages

The 3-way fight rages

To the south, the Marines and Orks had steadily been pummelling each other senseless. The fight ended with the defeat of the Space Marine Chapter Master by the lone remaining Ork Nob, who along with the Warboss were the only Orks left standing. The Space Marine Rhino beat a hasty retreat, presumably transporting several badly injured Assault Marines away from the battle, as the Necrons continued to stand firm at the tomb entrance. This battle was over, but the fight for Kaloris Secundus, and indeed the entire Kaloris system, most definitely was not...

26th April 2009

Space Marines (Stebloke) Vs Necrons (Gallear) Vs Orks (Scooby).
Warhammer 40K 5th Edition.

Scenario
Kaloris Campaign, Battle 2: "Doze Shiny Metal Unz Are Gunna Ged It"
Shortly after the discovery of the Necrons, a Storm Tigers detachment is dispatched to discover the fate of the Second Hand Marines. Meanwhile, Ork reinforcements are en route to get a piece of this new action and get some payback, while the Necrons are looking to solidify their hold on the area with the awakening of a Monolith.
Battle Synopsis

While no force involved managed to achieve a clear victory, all were able to come away from the battle after gaining some form of achievement. The Necrons were able to defend their power node buried in the forests, while the Orks stomped around the battlefield laying some serious smackdown on anything that got close enough. The Second Hand Marines came away from the battle with some survivors, and the Storm Tigers Marines were able to seal the Necron tomb with krak grenades. Nobody knows if sealing the tomb will slow down the Necron advance, or indeed how many other tomb entrances are out there...

20th June 2009

Necrons (Gallear) Vs Orks (Scooby).
Warhammer 40K 5th Edition.

Scenario
Kaloris Campaign, Battle 3: South Of The Saphirus
While Imperial forces on Kaloris Secundus withdraw to fortify their few remaining cities against this new threat, Necron armies are slowly waking all over the planet and entering combat with the rampaging Orks. One of the Ork Warbosses, Warboss Krakjaw, leads his warband into one such encounter, not more than a kilometre south of the main crossing of the river Saphirius...
Battle Synopsis

The Orks threw themselves forward, but the resolute Necrons remained solid in defence and slowly withered down the Ork horde. Warboss Krakjaw himself charged into battle with his 'Eavy Armoured Nobz, and after much hacking and bashing with his power klaw was finally able to render the spearheading Monolith a wreck. Yet as the end of the battle approached things looked good for the ancient warriors, with many of the Ork support units destroyed or disabled. Late reinforcements from Ork Deffkoptaz and an accurate shot from an Ork Boomgun that blasted the best part of an entire Necron Warrior unit to tiny little pieces turned the tide, and the Necron forces were forced to phase out.

Unknown Date 2009

Orks (Scooby) & Necrons (Gallear) Vs. Mixed Allies (Stebloke & JIK).
Warhammer 40K 5th Edition, with 4th Edition Apocalypse expansion.

Battle Synopsis

This game was our 2nd attempt at Apocalypse rules. The game featured Orks and Necrons versus a combined force of Marines, Eldar, Tau, Sisters of Battle, and even a mob of traitor Ork Boyz (hereafter referred to as the allies).
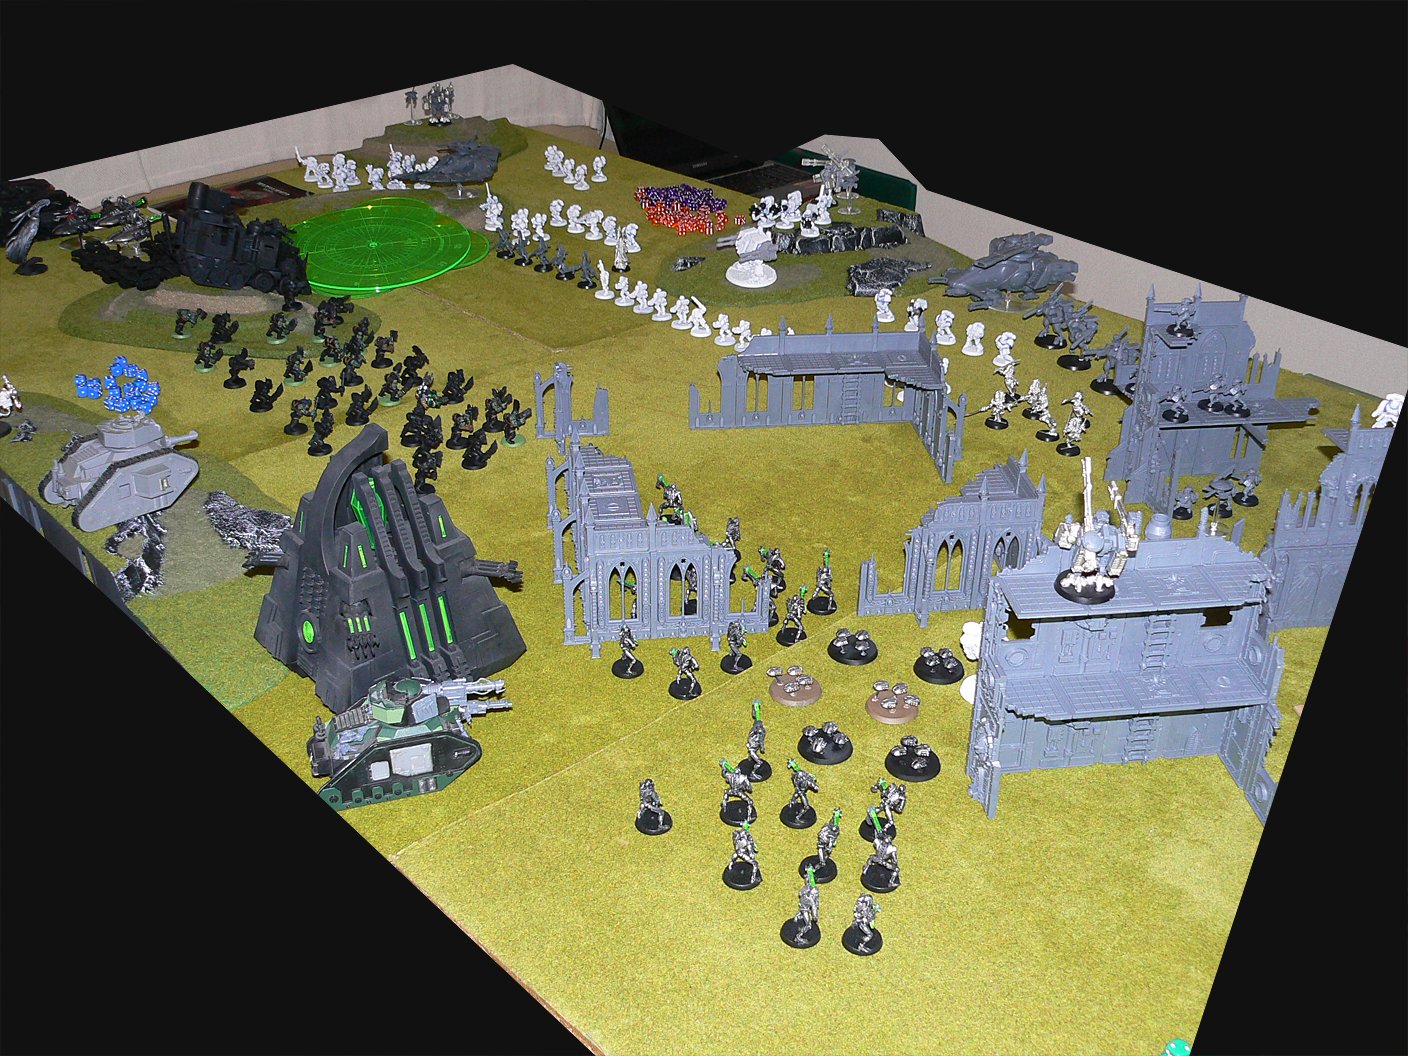
The Necrons and Orks did not set up anything on the board to begin with, and the allies raced onto the table to try and take control of as many objectives as possible. On turn 2, both Ork Stompas and a load of Necrons arrived and opened fire, causing masses of casualties among the allies.

Apocalypse Battle 2

Apocalypse Battle 2

The allies attempted to fight back, causing significant damage on one of the Stompas. But it continued to harass the allies until the Sisters of Battle Dominion Squad arrived and let rip with their meltaguns. The Stompa exploded very apocalyptically, taking out most of the Sisters, all 16 traitor Orks bar the Nob, the Howling Banshees, and causing damage to the 2nd Stompa.

By this time the allies numbers were very thin, as the Stompas gatling guns and deff-arsenals had torn through their ranks, but because of the lack of troops on the board for Necrons and Orks, the allies still had a foothold in the battle. This ended when the 2nd and last Necron Warrior unit arrived and took out a lone squad of Tactical Marines that was holding an objective that was way out on the allies east flank miles away from the rest of the action.
The Necrons and Orks won 1-0, and much fun was had.

12th September 2009

Orks (Scooby) & Space Marines (JIK) Vs. The Alliance (Stebloke & Chris).
Warhammer 40K 5th Edition, with 4th Edition Apocalypse expansion.

Battle Synopsis

The third Apocalypse game went much the same way as the 2nd. It saw a troop-heavy force of Imperial Guard, Witch Hunters, Tau and Eldar (now referred to as the Alliance) go against Space Marines and Orks. The Marines and Orks had their entire army in reserve at the start, leaving the Alliance chance to move out and try to get to the objectives. Trouble for the Alliance started when the 1st Stompa used Flank March to arrive right in the middle of their deployment zone, followed a turn later by the second. Other little scraps took place all over the board as reinforcements for both sides tried to help. The Alliance were greatly let down by their 3 Exorcists and a Hammerhead that arrived and attacked the 1st Stompa, as the few shots they managed either missed or did no damage.

Apocalypse Battle 3

Apocalypse Battle 3

It took a massive 6 hours to get through 3 turns, and the game ended there at 1-1. Had it gone on any longer it looked like the Orks and Marines would have taken firm control of the battle, as the Alliance had taken a battering. The craziness of this game inspired us to start tinkering with the Apocalypse rules, adding our own ideas and tweaks.

14th September 2009

Space Marines (JIK) Vs Necrons (Gallear).
Warhammer 40K 5th Edition.

Scenario
Kaloris Campaign, Battle 4: Rapid Defence
The city of Kharloa is the first to be approached by any force of Necrons. Second Hand Marines quickly react to the threat, and intercept the ancient warriors...
Battle Synopsis

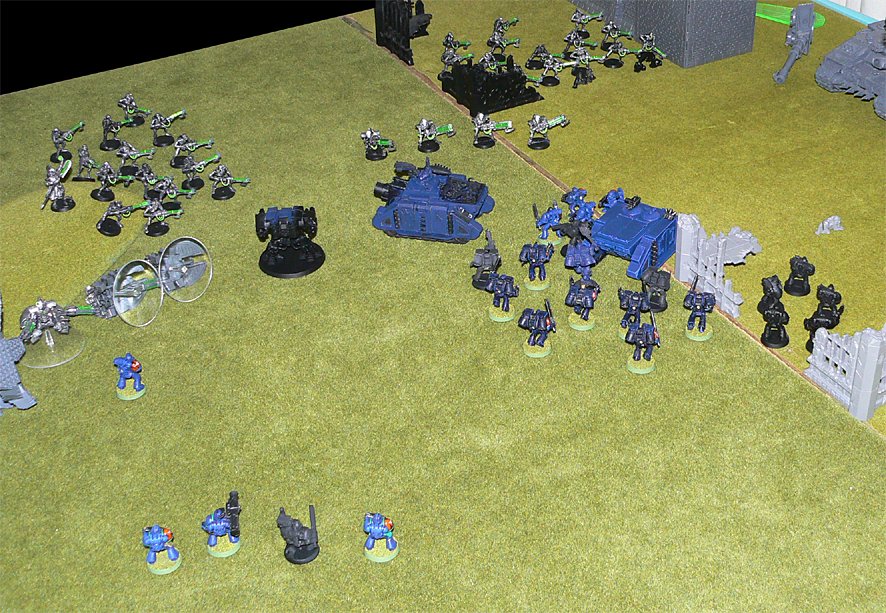
The battle started well for the Necron force. The Second Hand Marines had aggressively raced into attack positions, but ended up under volleys of fire from the Monolith's particle whip. Seven Tactical Marines and five Assault Marines fell before they could finally charge into combat with the Necron Warriors. Nearby, the Space Marine Dreadnought charged into the Monolith and wrecked it with its power fist, before losing the weapon to rapid firing Gauss blasts. With the Monolith destroyed and the Warriors under heavy close combat attack, the Flayed Ones would have been of great help to the Necrons, but failed to arrive from reserve.
The Necron Warriors were decisively struck down by the Assault Marines and their Chaplain, leaving just the Necron Lord remaining, who then phased out.

Marines attack the Necrons

Marines attack the Necrons

17th September 2009

Orks (Scooby) & Tyranids (Stebloke) Vs. Space Marines (JIK) & Tau (Gallear).
Warhammer 40K 5th Edition, with 4th Edition Apocalypse expansion.

Battle Synopsis

Just for a laugh the next Apocalypse game was a different beast all together. 3000pts of Space Marines and Tau stood ready to defend an ancient fortress, as a never ending wave of Tyranids and Orks tried to break through and get a Stompa to the far table edge in order to win. Any Ork or Tyranid unit completely destroyed would move back on to the table next turn to pile in to the fight yet again! However, each turn, the Marines and Tau would get a free orbital bombardment.

Apocalypse Battle 4

Apocalypse Battle 4

Initially things looked bad for the Marines and Tau, as their fire was largely ineffective on the Stompa. Things picked up though as the Stompa tried to assault the fortress but ended up just 1 inch away. More volleys of fire hammered into the machine, and the Terminators jumped from the walls to smash it with their power fists. Though it had still only suffered 2 structure points the Stompa's drive was damaged and its driver stunned, seriously hampering its chances of reaching the other board edge.

Apocalypse Battle 4

Apocalypse Battle 4

Still, the fortress walls had taken a pounding, with the eastern most tower collapsing under an Ork orbital bombardment, and the gatehouse finally falling under an attack from a Carnifex. Captain Lysander had revenge, as he lobbed a Vortex Grenade into the onrushing hordes, which swallowed the Carnifex, the Ork Battlewagon, and a load of Burna Boyz and Genestealers.

After playing for as long as we could, the Ork and Tyranid attack had stalled at the walls. The defenders had taken heavy casualties but they had managed to successfully defend the fortress.

31st October 2009

Imperium (Stebloke & JIK) Vs. Chaos & Orks (Scooby) & Necrons (Gallear).
Warhammer 40K 5th Edition, with 4th Edition Apocalypse expansion.

Battle Synopsis

Since the last battle, the Apocalypse forces had been re-inforced. The Chaos forces had received a traitor Baneblade and Shadowsword, and the Imperial forces had recieved a Shadowsword and a scratch built Warhound Titan!

Most of these new monstrous units got a chance to strut their stuff in the next Apocalypse battle. 3000pts of the Imperium's finest squared off against Chaos, Necrons and Orks, and for the first time we used our house rules stating at least half of the army must start the battle at the beginning of the game.

The Imperial army won the dice-off for first turn (both teams had bid 3 mins), and the opposition failed to steal the inititative. The Warhound opened up the battle with fire from both of its turbo-lasers, wrecking the Chaos Baneblade before it could even fire a shot. The rest of the Imperial force opened fire, penetrating the armour on the Stompa and traitor Shadowsword several times, but each time they passed their primary weapon saves.

The enemy counter attacked, wrecking the Vindicator, blowing up the Leman Russ, and causing masses of casualties among the Imperium's troops. A Bloodthirster of Khorne materialized and charged into the Warhound, causing damage to the machine but not enough to drop it.
The Necron Warriors advancing on a central objective proved a great thorn in the Imperium's side as they passed their We'll Be Back rolls time and again due to the Lord in their ranks.

Captain Lysander deep-striked into the fray with a full unit of Terrminators, but took a hefty blast from the Warhound's weaponry (which was being sneakily controlled by the Necron Lord) before they could charge the Necrons. Even when Lysander crushed the Lord with his thunder hammer, the Necron leader had the cheek to re-contruct itself and re-enter the fight.

Chaos Terminators deep-striked into the battle near to the Warhound and opened fire with their combi-meltas, destroying it in a ball of fire. The Imperium's groans of defeat were short lived due to the use of the Replacements asset, as another Warhound joined the fray the very next turn, opening fire on the Chaos Terminators and getting revenge by wiping them out.

The Sergeant of a Marine Tac. squad could only reduce the traitor Shadowsword to 1 structure point using his power fist, failing to shift the machine from one of the objectives. More fire reduced the Stompa to 1 structure point, but no more damage could be done. Neither team had a troop choice claiming an objective at the end of a very close battle and it ended 0-0.

22nd November 2009

Space Marines (JIK) & Tau & Eldar (Stebloke) Vs. Chaos & Orks (Scooby) & Necrons (Gallear).
Warhammer 40K 5th Edition, with 4th Edition Apocalypse expansion.

Battle Synopsis

For the 6th Apocalypse battle we went for something a little different. Rather than have a battle ruled by large vehicles, we went for a massive 4000pt battle with no super heavies allowed. It ended up being Space Marines, Tau and Eldar against Chaos, Necrons and Orks (with a couple of slave Tau battlesuits). Also, there would be no objectives in this battle and we would just fight to obliterate the opposition.

Apocalypse Battle 6

Apocalypse Battle 6

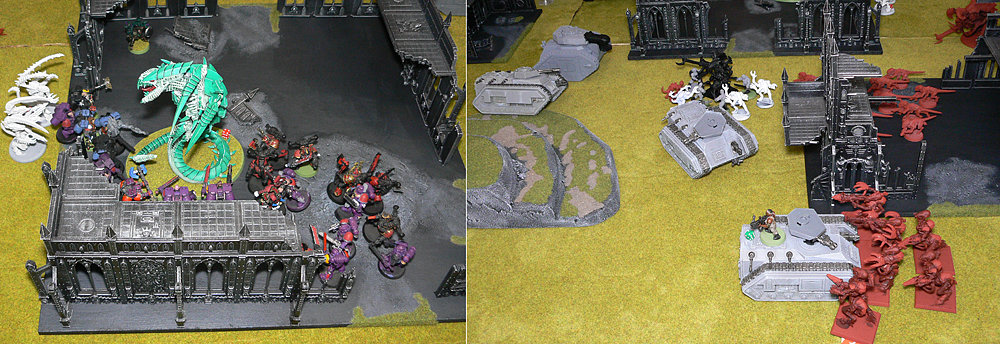
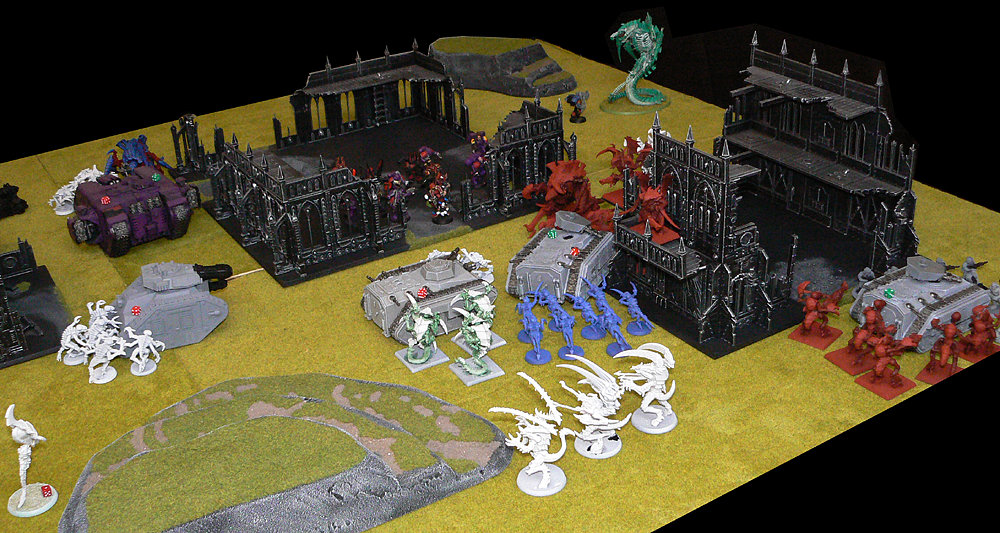
On the western flank, the Chaos and Orks surged forward to attack the Space Marines and Eldar, as the Necrons advanced through the ruins trading fire with their enemies. The large Ork Boy mob charged into the Space Marine Scouts and butchered them, before return fire from Tactical Marines and Dire Avengers, guided by a Farseer, cut down many Orks in return. The Dire Avengers and the Farseer charged in to mop them up, but not before the Farseer fell to the Ork Nob and its power claw.

Nearby, the Warboss and his Nobz charged the Wave Serpent and smashed it to bits. The Fire Dragons inside jumped clear and returned fire, incinerating several of the Nobz, before being cut down by the charge of the Orks.

The Tau Broadsides and Hammerhead opened fire with their railguns, trying to thin the approaching tide, but their firepower was largely ineffective. Two of the Broadsides were cut down in reply. Chaos Obliterators attempted to deep strike behind the Hammerhead, but scattered off the board and were destroyed. Also having problems were the Space Marine Assault Squad and Chaplain, who were delayed and didn't arrive either.

Three Tactical combat squads attempted a crazy charge against the Nobz Bikers, and were nearly all wiped out. Nearby, the Chaos Land Raider approached the enemy lines and Kharn led a full squad of Khorne Beserkers out of it. The surviving Tactical Marines were joined by Karandras and his Striking Scorpions, who had just joined the battle, and the allies formed a counter charge. At the end of a firefight and a bloody close assault, Karandras and Kharn were the only ones left standing amongst the broken bodies of their allies.

In the ruins, the Necrons had advanced fairly untroubled, with even the Monolith dodging several railgun shots. A Guardian squad cut down the Scarab unit as it got close, but the other Necrons seriously withered down their opposition, with the Howling Banshees and Fire Warriors taking terrible casualties.

That's where the battle ended, with the forces of destruction turning the screw...

28th December 2009

Imperium, Eldar & Necrons (JIK, Stebloke & Gallear) Vs Tyranids.
Warhammer 40K 5th Edition.

Scenario: Winter Wave 1

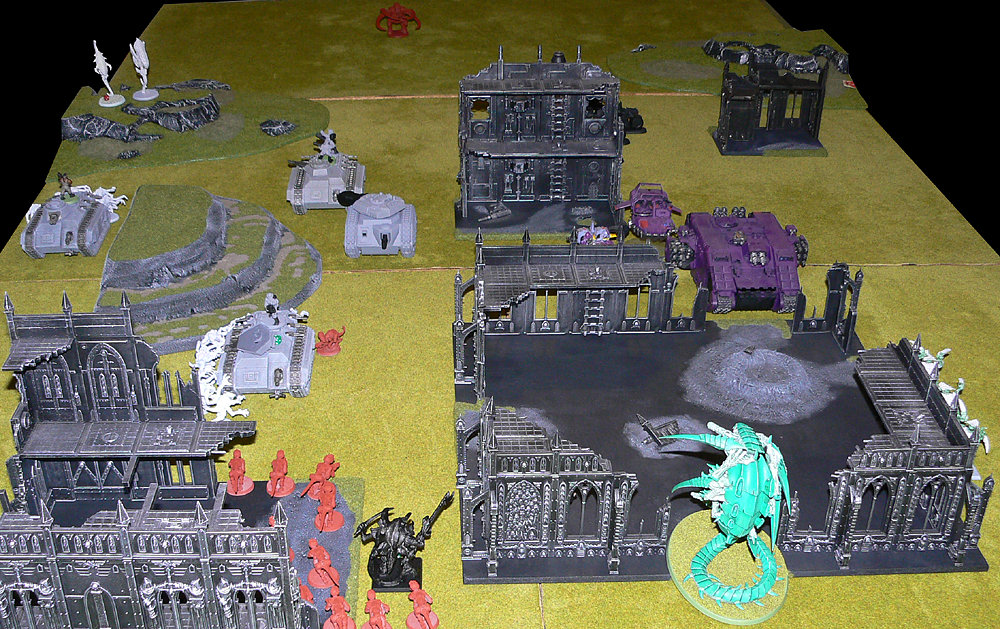
For many, many, many years we have spoken about our want to take part in a special type of 40K battle where we all join forces and take on a never ending horde of Tyranids, just to see how long we can last. A couple of weeks ago, we finally decided to do it. Quite nice really, as it will give the old Nid Codex an interesting final game before the new one comes out in a few weeks.

Me and Scooby tried something like this a long while ago playing Epic Space Marine, where my Guard and his Squats sat there and shot the crap out of the Nidz as they ran the length of our 7 foot board to try and get at us. In a way it was too easy, as because nobody was controlling the Nidz we decided they would all automatically attack the closest target. The automatic Nid behaviour would also have to happen this time, but to make things much more interesting we decided we will not just be able to sit back and fire at the approaching hordes. Instead, we have given ourselves a little objective.

Destroyed in an earlier battle against the Hive Mind, the Shadowsword "Heart Of Stone" was to be found 4 or 5 feet into the 7 foot board. We will have to get a unit to it in an attempt to retrieve critical information or a sacred relic or something, then get that unit back off our table edge to win. We will have to fight our way passed a random number of Nidz that will be present on the board from the start. And each turn a random number of Nid units will come onto the board from the far table edge. Considering it was gonna take us at least 3 or 4 turns to actually get to the Shadowsword, there's gonna be a lot of Nidz around by the time we got there...

Ideas for the Stebloke and Gallear characters

Ideas for the Stebloke and Gallear characters

Something that was quite cool about that old Epic wave attack was that me and Scooby had made Epic characters to represent us in-game. If I remember right, my little fella went out like a punk, but Scooby's fell in a heroic counter-charge against a Hive Tyrant, almost killing the thing to boot. When discussing ideas for this battle we agreed it was a cool idea to do this again, and started to come up with some ideas.

Scooby was the first to put his model together - a cool Jump Pack Marine with a Relic blade painted in the colours of his Dawn Of War chapter "The Bringers Of Death", and this inspired the rest of us to come up with some ideas.

With character ideas coming thick and fast, we needed some rules ideas for us. I thought it would be cool if we could all specialise in a certain area. Scooby would be close combat, Gallear survival, myself heavy weapons, and JIK would be a good all-rounder. We also each had a special rule that could enhance units if we joined them. We gave Scooby Fleet which he could confer onto other units. JIK had a range finder that increased a unit's accuracy if they remained stationary. Gallear could use a deflector shield to give units an invulnerable save. And I could try to issue an order like Imperial Guard officers that could also increase shooting potential.

We realised these rules could make us very effective on the battlefield, so we kept our stat lines themselves quite moderate, much like minor heroes. I wanted our characters to be more supportive and inspirational to other units than be awesome fighting forces that could turn battles on their own.

Also, there were concerns raised about rolling dice for the Nidz. After all, none of us wanted to roll dice that could harm our team mates. To this end I had two ideas: in close combat we could roll our own dice to "dodge" Nid attacks. For example if we would normally be hit on 3s we would roll dice to dodge on 5s etc...

For ranged attacks and choosing which Nid units would arrive each turn I developed a small Visual Basic program that we could just jab when we needed to. All we would have to do for the shooting part would be enter the attack stats and click go. For choosing Nid reinforcements we would just have to tick which of the units were ready to enter (or re-enter) battle and it would highlight which ones would arrive by turning them yellow. Sound in theory. Lets hope it works.

With all the special rules sorted, all we need to is pick 600pts each to join our characters in this massive task, paint what models we can, and get down to the table...
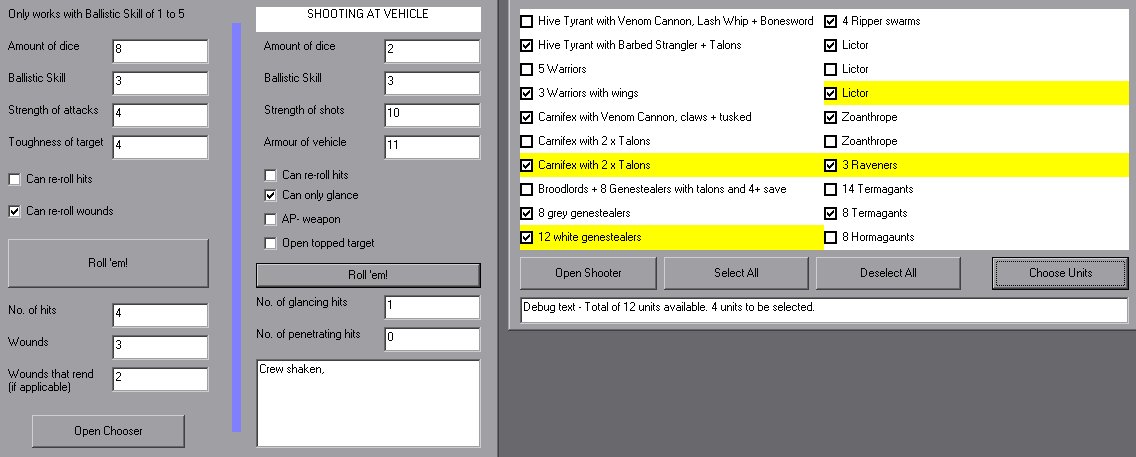
VB Program

VB Program

Feverishly painting special characters to take part in the game

Feverishly painting special characters to take part in the game

Battle Synopsis

The allies were hit with a bitter blow for the start of the battle: Commander Scooby could not take part, seemingly the victim of a Tyranid virus. Undaunted, the other heroes recruited units similar to what Scooby would have led to battle, and added them to their own force. It was hoped that Scoob's close combat prowess would not be missed, as the mission began...

A Carnifex, a Hive Tyrant, two broods of Genestealers, and a brood of Hormagaunts were the initial force that needed to be overcome. JIK stood back for a while with the Imperial Guard heavy weapon squad and helped them target the Hive Tyrant, as the rest of the force surged forwards. The larger Genestealer brood took the brunt of the opening fire, with the Whirlwind and Necron Destroyers letting them have it. The Hive Tyrant was finished off by the Wraithlord's Brightlance and JIK's Dreadnought's autocannons.

A completely untouched Carnifex bore down on the flanking Guardsmen, halting their advance. Stebloke ordered the Terminators to fire at the lumbering beast. 10 Storm Bolter shots and 4 Assault Cannon shots, all classed as twin-linked, hammered into the beast and ripped it apart in a single volley of fire.

On the west flank, the advance of the Assault Marines was being threatened by the presence of the Hormagaunts and Genestealers. Necron Immortal and Warrior fire soon changed that, and the Assault Marines pistols and flamers finished off the last few Genestealers.

By the end of the third turn the initial Tyranid force was all destroyed for no loss. The Space Marine Assault Squad were bearing down on the objective, closely followed by Inquisitor Rayne who had managed to run 6" twice on the trot. But it wasn't all going in the favour of the allies. The first big wave of Nidz had emerged from the far edge, out of range of nearly all guns and closer to the tank than the allies were.
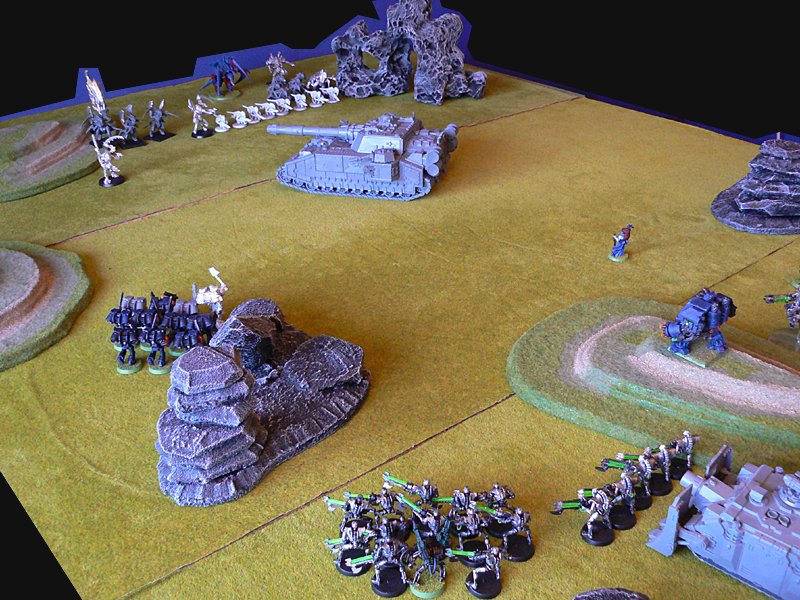
End of turn 3

End of turn 3

On turn 5, Inquisitor Rayne jumped into the Shadowsword and began to hunt for the artefact. In support, the Imperial Guard Veterans jumped out of their Chimera near the rear of the super heavy tank to provide covering fire along with other units. The second main Tyranid wave was now threatening to envelop the tank, and the Eversor Assassin fell trying to fend off a brood of Termagants, but took them all with him as he exploded.
A large Genestealer squad charged into action from the flank of the allies. They cut their way straight through the Necron Destroyers and next charged into the Veterans and Stebloke. The allied units stood little chance and were all annihilated for no response. To make matters worse, the Broodlord and Lictor tore into the Chimera and wrecked it, leaving the Inquisitor with no transport option for when she returned.

Action on turn 6

Action on turn 6

Fearing the Nidz were taking control of the Shadowsword, the allies doubled their efforts. The Broodlord, Lictor and nearby Genestealers were all cut down in short order, and the Venerable Dreadnought charged headlong into the Carnifex to do what it could. The Tyranid brute immobilised the revered warrior, but eventually after several assault phases duking it out, the Carnifex found its head crushed by the Dreadnought's power fist.

The Assault Squad, weakened by a Zoanthrope's Warp Blast earlier in the battle, now decided it was time to act. They charged into the fray on the allied left flank, holding off the larger Warrior squad, 8 Hormagaunts and a Carnifex for several turns before finally being defeated. The victorious Carnifex and last Warrior crunched into the Vindicator and destroyed it spectacularly, and the explosion took out a couple of nearby Gaunts.

More and more Nid reinforcements started to appear all around. The large Guardsman platoon came under attack from a Lictor and managed to club it to death with their lasguns after losing several of their number, before having to destroy a brood of Gaunts that had appeared behind them. On the other flank a Carnifex charged through the rock formation there. JIK's Vindicator targeted it but missed and killed 3 Tactical Marines by accident. The Carnifex charged and killed the last 2 Marines before coming under fire from the Heavy Weapon squad. It finally fell victim to the ninja death toast fired by the Wraithlord's Shuriken Catapult.

Carnifexes seemed to be the most common Tyranid unit, and another one entered the fray. JIK's Terminators were once again on the ball, cutting it down in another blinding round of shooting, this time without Stebloke's handy instruction. They were getting a feel for the battle now, and later also mushed up the Ravener brood with their power fists.

Inquisitor Rayne finally returned from the Shadowsword clutching her prize on turn 8, and settled into the Necron Warrior squad to gain their protection. The Necron Immortals managed to distract the bounding Hormagaunts as the Necron Warriors ran for the allied deployment zone. The talons on the Hormagaunts could not damage the tough metal bodies of the Necrons and the Immortals swatted their opponents away like flies.

Run away!

Run away!

Aftermath

The Inquisitor and her bodyguard were at least 3 or 4 turns away from safety, but after a full day battling we were all getting quite tired and hungry. As a lot of the Nidz in play were half the board away and our other units were holding them up while making a fighting retreat, we decided at the end of turn 9 that we had done enough to complete the mission. The game was over...

A fun game overall, though we were only really under threat during the middle couple of turns when the Inquisitor was hunting for the artefact and the Nidz were all over the super heavy tank.
It was definitely a good idea part way through to say that the Nidz would start appearing from any table edge, as this also gave us some difficulties at times. If I could plan the game again I would probably not have the full 7 foot length on the board, and have the Nid reinforcements appearing from all around right from the start. There were just a few too many moments where Nidz were too far away to attack us of for us to shoot them.
Still, we got the sacred artefact, and all that's left to do now is wonder what the hell was it that was so important that humans, Eldar and Necrons would all find it worthwhile teaming up to protect?

Hmm.

4th April 2010

Necrons (Gallear) Vs Space Marines (Stebloke) Vs Chaos (Scooby).
Warhammer 40K 5th Edition.

Scenario
Kaloris Campaign, Battle 5: Into The Unknown
After several months of fighting, the fate of Kaloris Secundus is still in the balance. The Space Marines and Imperial Guard Stone Legions have managed to secure most of the remaining major cities, but hordes of rampaging Orks and freshly awoken Necrons still roam the jungles putting each other to grizzly ends. Destroyed war machines and ruined buildings litter dozens of battlegrounds the planet over, and the three way battle for supremacy looks far from ending.
On an intel-gathering mission in the jungles, Storm Tigers scouts come across an Ork Mek fleeing a large Necron force, any retinue the Mek may have had already killed by the advancing Necrons. The scouts are more interested in the glowing artefact that the Mek is clutching.
Deciding they must know what this artefact is, and that they must not let the Orks or Necrons get away with it, the Storm Tigers ready themselves for battle. They march against the Necrons at the break of dawn as the Ork Mek takes shelter in a ruined Baneblade.
Battle Synopsis

The armies advanced towards each other, all the while closing on the Baneblade. Inside, the Ork Mek jabbed at random buttons trying to get the tank's weaponry online. Necron Warriors were the closest to the battle tank, but Assault Marines and a Tactical Squad in a Rhino were readying their attack.

Marines and Necrons do battle

Marines and Necrons do battle

It was at this time when all of the players on the battlefield were hit by yet another surprise: emerging from the warp, Khorne Bloodletters roared as they assaulted into the Necrons, hacking many down with their demon blades. The Storm Tigers also felt the wrath of the emerging Chaos interlopers, as traitor Terminators teleported down and tore into the Assault and Tactical Marines.

While both Marine and Necron rear-guards struggled to contain this new threat, the Necron Warriors that had closed on the Baneblade came under attack from Tactical Marines, and after a bloody close combat managed to fend them off. The Warriors relentlessly marched on the tank, slaughtering the Mek and recovering the strange device. The Storm Tigers were left to fall back as the Necrons phased out with their prize.
Only time will tell how powerful and bizarre the item was for it to be of so much interest to the Mek, and to seemingly draw the Necron and Chaos forces into action...

December 2010

Imperium (Stebloke & Scooby) Vs. Orks, Chaos & Tyranids.
Warhammer 40K 5th Edition.

Battle Synopsis: Winter Wave 2

The annual Winter Wave saw Stebloke and Scooby leading the Space Wolves, Kaloris 1st Stone Legion and the Storm Tigers as they defended a fortress against Orks, Nidz and Chaos. Unfortunately due to illness and the rapidly approaching Christmas the game could not be finished. Though to be fair the defenders would not have held out for much longer. Highlights included the Ork Warboss getting squished by a Rhino after failing Death Or Glory, the Bloodthirster taking every piece of heavy weaponry thrown at it, the Klawstompa's driver being stunned every turn and it not going anywhere, Njal Stormcaller nearly killing himself, and the Kaloris super heavy tanks being damn near useless in their debut game.

Deployment

Deployment

Part way through turn 2: One tower is already down

Part way through turn 2: One tower is already down

Start of turn 3: A wall section down, and defence under serious pressure

Start of turn 3: A wall section down, and defence under serious pressure

4th August 2011

Space Marines (Stebloke) Vs Space Wolves (Scooby).
Warhammer 40K 5th Edition.

Scenario

In this 3000pt battle, there were no force organisation limits on the forces except you could not use more than 2 HQ slots. We played our usual mission of pitched battle, decided on victory points, with the battle ending at the end of the 5th turn.

Battle Synopsis
Deployment

Deployment

End Of Space Marines Turn 1

End Of Space Marines Turn 1

End Of Space Wolves Turn 1

End Of Space Wolves Turn 1

End Of Space Marines Turn 2

End Of Space Marines Turn 2

End Of Space Wolves Turn 2

End Of Space Wolves Turn 2

End Of Space Marines Turn 3

End Of Space Marines Turn 3

End Of Space Wolves Turn 3

End Of Space Wolves Turn 3

End Of Space Marines Turn 4

End Of Space Marines Turn 4

End Of Space Wolves Turn 4

End Of Space Wolves Turn 4

End Of Space Marines Turn 5

End Of Space Marines Turn 5

End Of Space Wolves Turn 5

End Of Space Wolves Turn 5

Aftermath

We didn't bother counting up victory points, both happy to declare the battle a draw. It would probably have been an easy win for the Space Wolves had Logan's Drop Pod not scattered away, but instead ended up being a close battle full of much death.

December 2011

Space Marines (Stebloke) & Space Wolves (Scooby) Vs. Orks.
Warhammer 40K 5th Edition.

Scenario: Winter Wave 3

The annual Winter Wave saw Stebloke and Scooby leading 4000pts of Space Wolves and Storm Tigers in an attempt to stop a never ending wave of Ork Stompas from breaking through their lines. The battle was played down the length of a 6x4 table. The Space Marines set up on their half of the table, and a Kustom Stompa (with Deff Arsenal, Belly Gun and Repair Krew upgrades), a Klawstompa, and a Big Mek's Stompa set up on their own table edge. The Space Marines would lose if one of the Stompas could break through their line and reach their table edge. Every time one of the Stompas was destroyed a new one of the same type would enter play on the next turn. The Klawstompa and Big Mek Stompa also had the Repair Krew upgrade, even though they are not supposed to have it, just to stop the Space Marines from immobilizing them and then leaving them stuck there.

Space Marine Deployment

Space Marine Deployment

Battle Synopsis

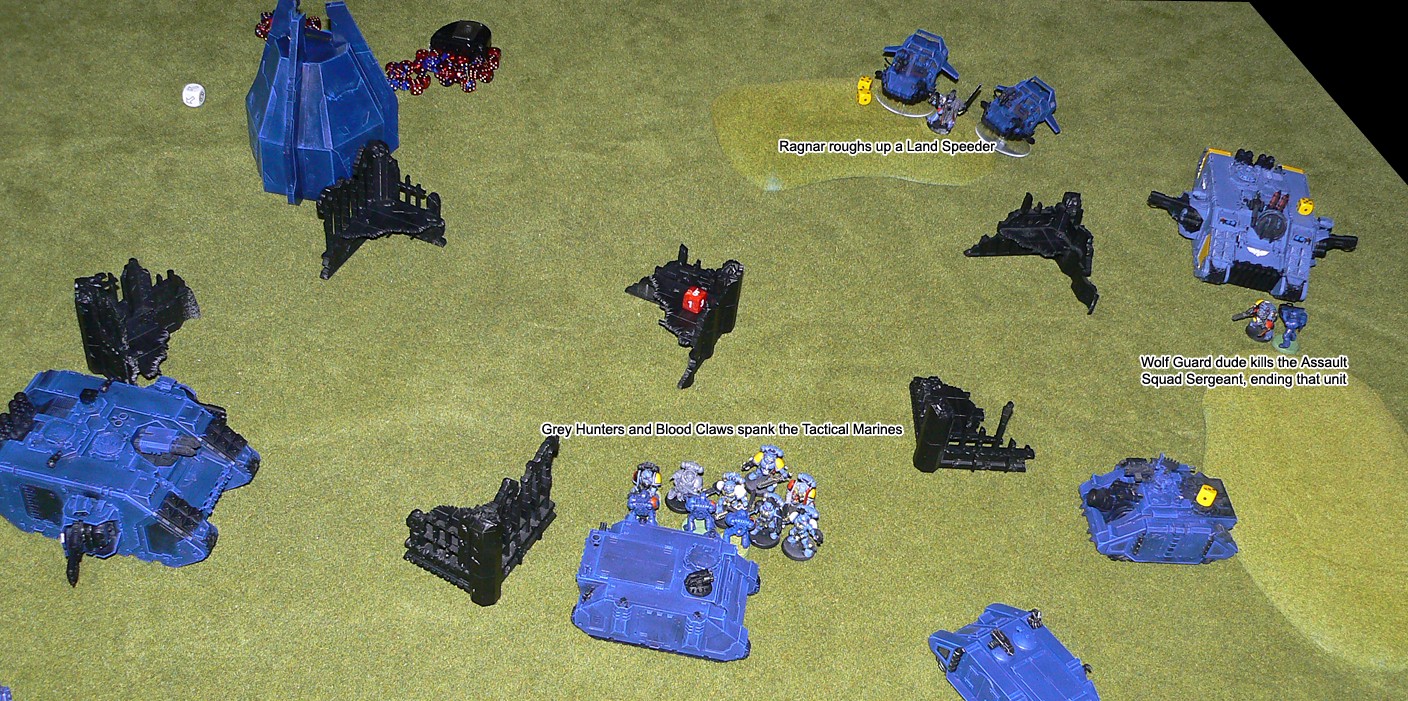
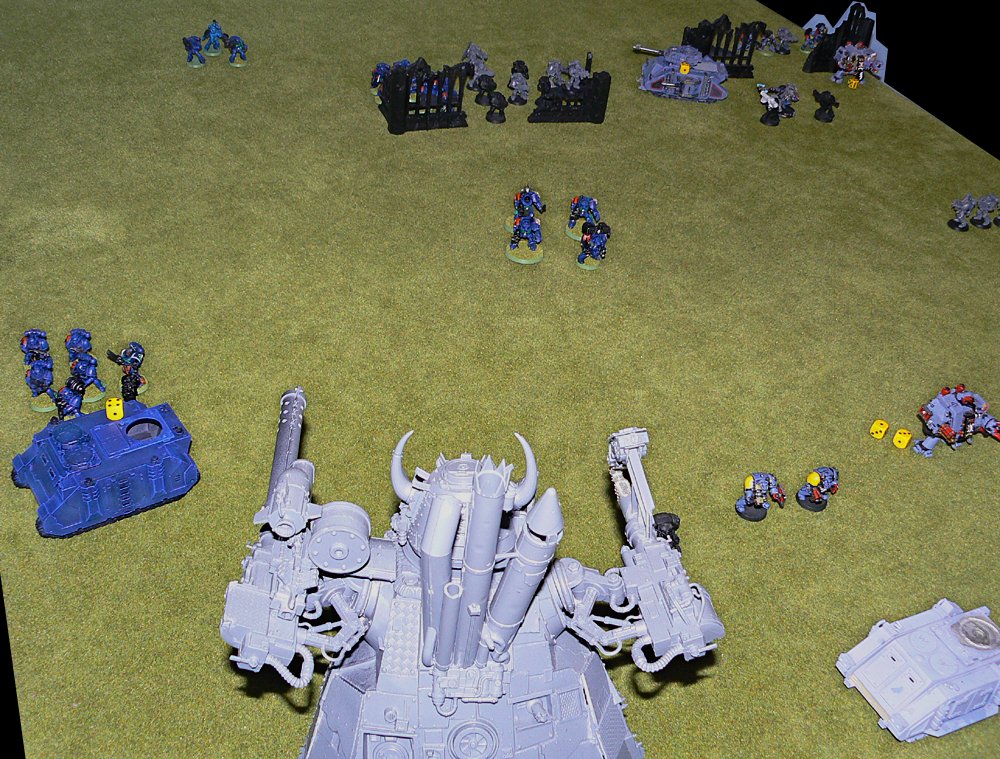
The early turns went well for the Marines, with the Kustom Stompa being immobilized, many Stompa weapons being stunned or destroyed, and the Klawstompa being torn apart by Bjorn The Fell-Handed. But the Big Mek Stompa shrugged off most that was thrown at it, and its Lifta-Droppa combined with the Kustom Stompa's Deff Arsenal had the Marine vehicles in all kinds of trouble. The Big Mek Stompa then reached the Storm Tigers line and proceeded to crush a Tactical Squad and the nearby Vindicare Assassin into puddles of mush. The Tigers retaliated with all of their melta weapons and fried the Stompa, which exploded, taking out a Tactical Squad, some of another squad and all the Tigers' cover.

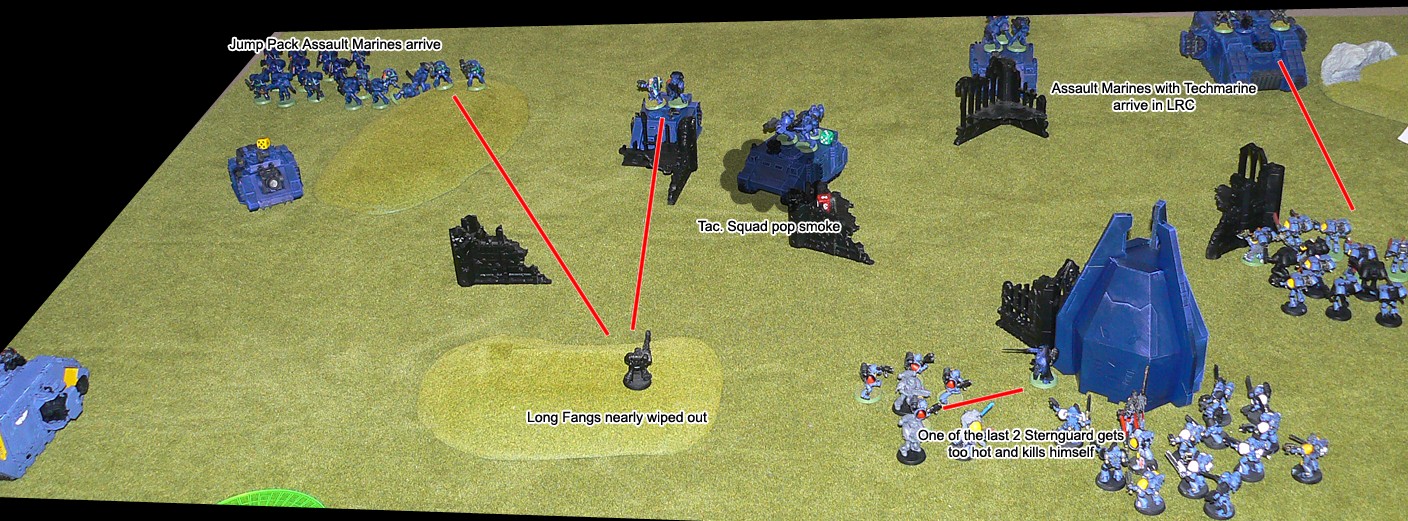
The end of turn 3: The Big Mek Stompa crashes into the defenders as a fresh Klawstompa enters the fray

The end of turn 3: The Big Mek Stompa crashes into the defenders as a fresh Klawstompa enters the fray

A new Big Mek Stompa arrived, and the Kustom Stompa began repairing its damaged weapon systems. The new Klawstompa got payback on a now damaged Bjorn and stamped out the venerable Space Wolf's existence, while the Big Mek's Stompa got its own payback against the Tigers, with 2 turns of accurate fire from its Gigashoota and Deth Kannon. Suddenly, the Space Marine defences looked totally inadequate. The Kustom Stompa's repaired weapons unloaded on the Space Wolves, taking out nearly a whole Grey Hunter unit and most of the Long Fangs. Logan led the surviving troops forward, determined to hold the Ork momentum. The Klawstompa plowed in to combat, and despite Logan taking it down to its last structure point, the Ork killing machine had the final say and Logan and his unit were defeated.

We ended the game there, after 9 turns of holding the Stompas back. There was hardly anything left on the board capable of continuing the defence.

The end of turn 6: The Big Mek Stompa observes the rapidly diminishing defences

The end of turn 6: The Big Mek Stompa observes the rapidly diminishing defences

22nd December 2011

Imperial Guard (Chris & Stebloke) Vs Orks (Scooby).
Warhammer 40K 5th Edition.

Scenario: Waaaghammer World

This 1750pt battle was special for us as it took place during our first ever visit to Warhammer World. We rolled Pitched Battle and Annihilation.

Battle Synopsis
Imperial Guard Deployment

Imperial Guard Deployment

Ork Deployment

Ork Deployment

Imperial Guard Turn 1

Imperial Guard Turn 1

Ork Turn 1

Ork Turn 1

Imperial Guard Turn 2

Imperial Guard Turn 2

Ork Turn 2

Ork Turn 2

Imperial Guard Turn 3

Imperial Guard Turn 3

Ork Turn 3

Ork Turn 3

Imperial Guard Turn 4

Imperial Guard Turn 4

Ork Turn 4

Ork Turn 4

Imperial Guard Turn 5

Imperial Guard Turn 5

Ork Turn 5

Ork Turn 5

Aftermath

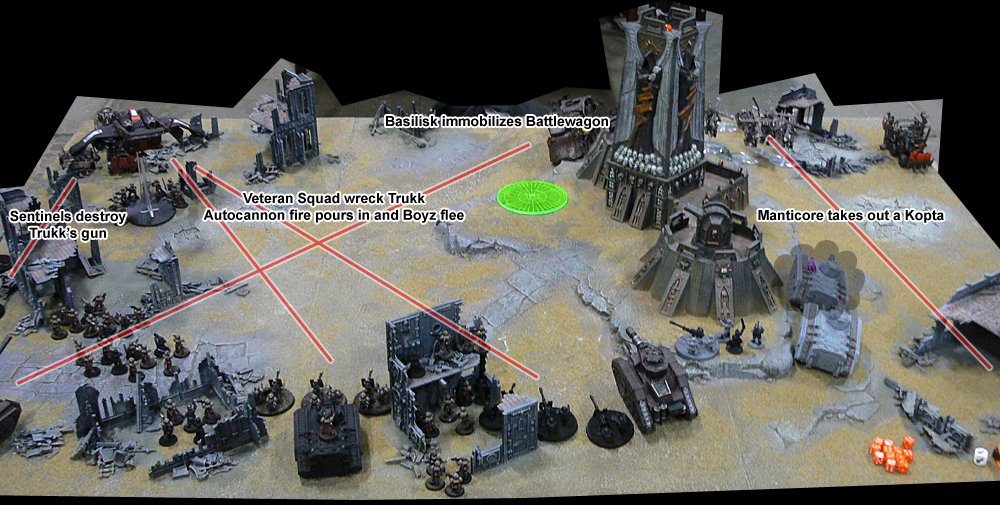
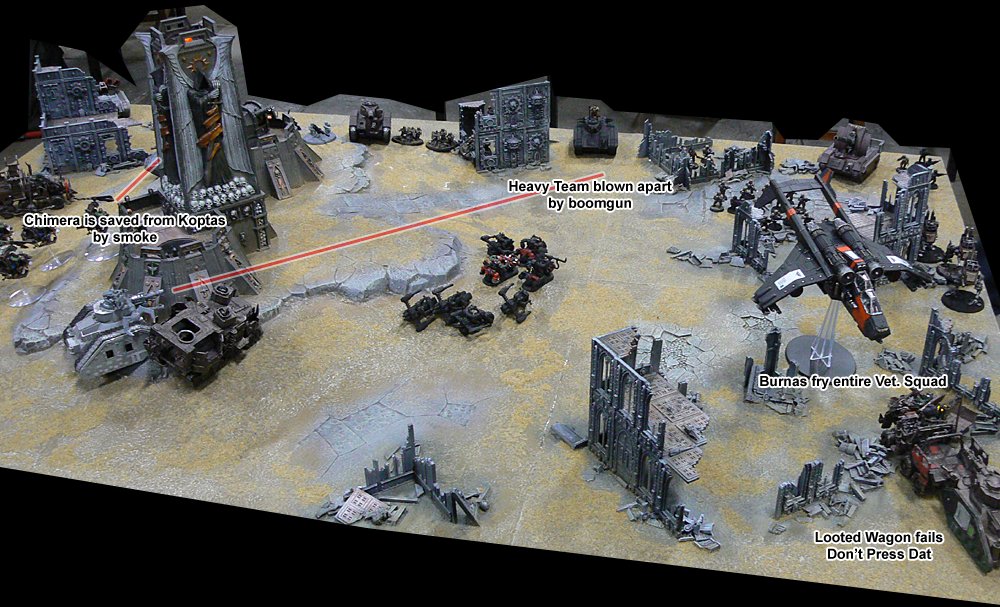
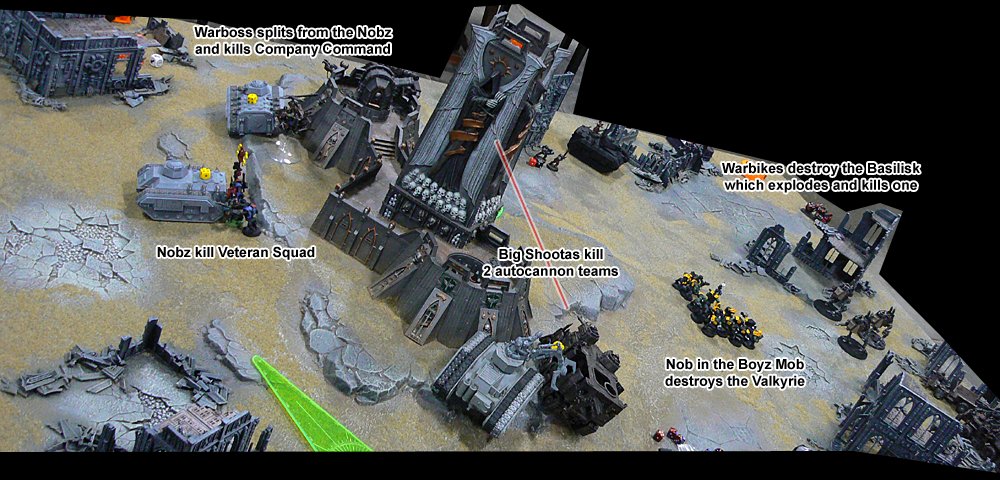
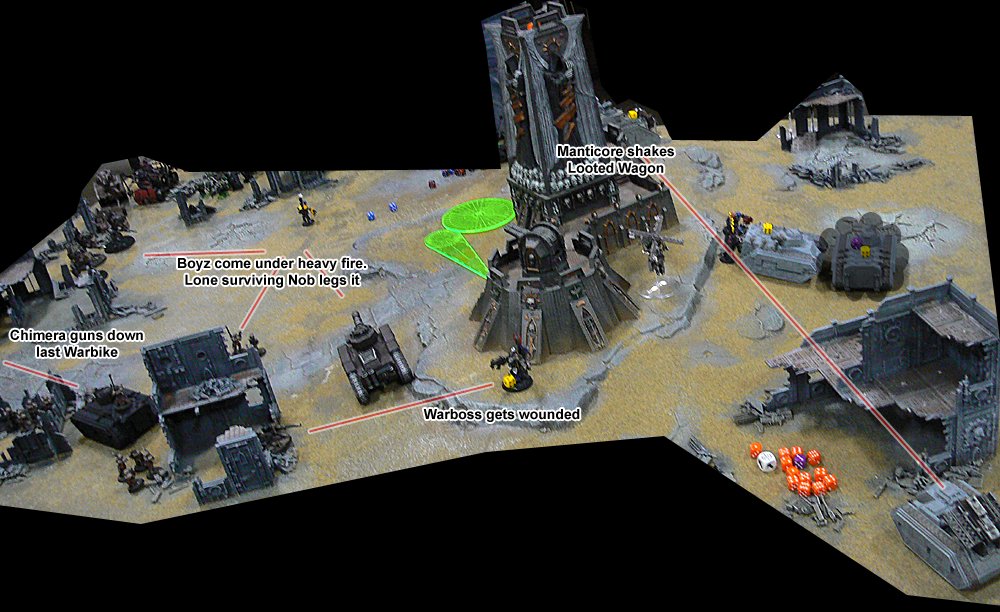
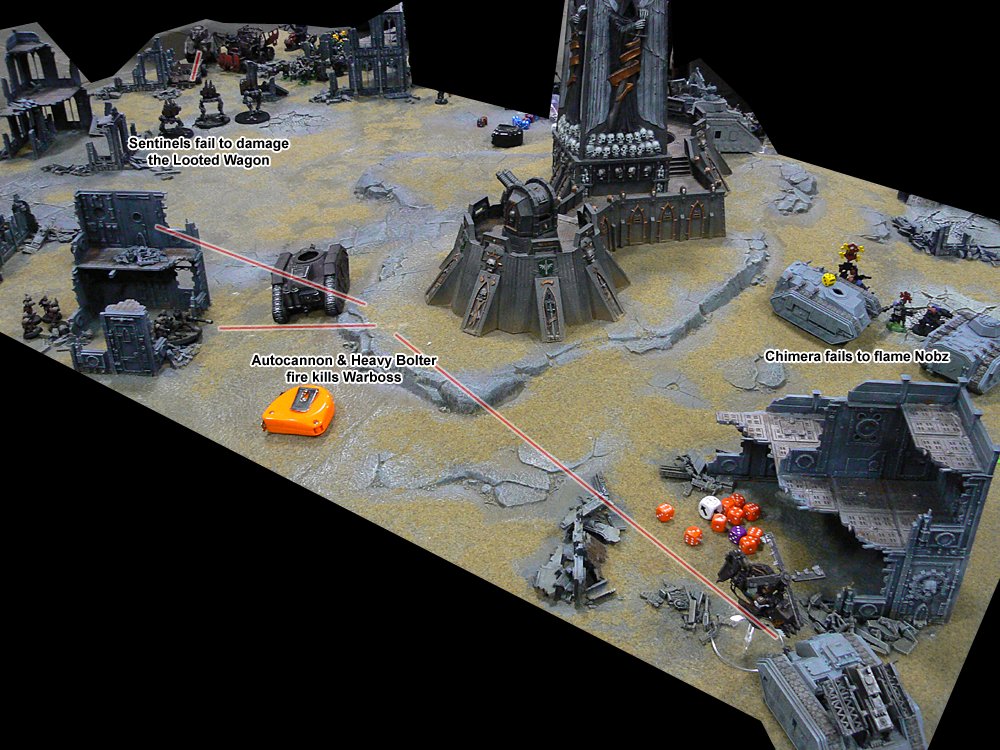
With a roll of 1 the game ended there at the end of turn 5. After a decent start, the Guard were reeled in and crunched by the Orks with a score of 11-8. The main turning point seemed to be turn 3, when the Guard shooting was largely ineffectual, and the Orks were able to destroy nearly everything they attacked.
Units of the battle were the Sentinels, Burna Boyz and Warbikes. All three units performed admirably and caused much death.
Biggest waste of space had to be the Manticore, rolling only 5 blasts from a possible 12, and barely hitting anything with them all game. The only thing it did was take the last wound off the Warboss with its heavy bolter.

Still, a great game enjoyed by all.

17th-19th February 2015

Imperial Guard (Stebloke) & Space Marines & Chaos (Scooby) Vs Tyranids.
Warhammer 40K-S 0.1b Playtest.

Scenario: Winter Wave 4

Stebloke and Scooby take command of a convoy of Kaloris Stone Legion Imperial Guard and Bringers Of Death Space Marines as they look to retrieve some malfunctioning experimental equipment. Will they manage to claim the objective and retreat off of their own table edge as a never-ending swarm of Tyranids attacks from all sides?

Battle Synopsis

The convoy approached the ruins containing the objective as the first Tyranid broods appeared, skulking behind ruins and hills as they attempted to stay out of sight. Two Zoanthropes could find no cover at all as the Land Raider Crusader opened up with all of its guns and turned them both to pools of ooze.

More Tyranids encircled the advancing convoy, with a Carnifex, a Trygon and some Raveners entering the area near to the objective ruin. Hormagaunts and Termagants stalked towards their prey, as the allies opened fire once more. Most of a Termagant brood vanished in white hot plasma as the Leman Russ Executioner unleashed its firepower, and some Hormagaunts were blasted apart by the Crusader.

A Carnifex looked to sneak up on the convoy from the rear, as two broods of Genestealers and two more Zoanthropes appeared to threaten the Imperial Guard flank. Luckily, the Zoanthrope warp blasts both missed their targets, as flame from the Chimeras thinned the Genestealers as they charged forward. One of the Chimeras took heavy damage as the Genestealers damaged its tracks and tore off both of its heavy flamers.
Nearing the objective ruin, the Land Raider and Land Speeders opened up with all their weapons and nuked the Carnifex there, as the bike squad mopped up the nearby brood of Hormagaunts.

The convoy reaches the ruins

The convoy reaches the ruins

Lictors, another Carnifex, and a Genestealer brood led by a Broodlord all reached the battlefield, and the Bringers Of Death readied themselves to face them. The Berserker squad charged from the Crusader and in to combat with the Raveners, as a Bringers jump pack squad dropped from the sky right in to the ruins. The Berserkers made short work of the Raveners, but the Trygon and Lictors got the charge on the assault troops and tore in to them with tooth and claw. The Bringers fought back ferociously and the battle was drawn.
On the other flank, a Warrior brood arrived. One Stone Legion Chimera drove away from the attacking Genestealers to try and flame the new arrivals, but the Warriors jumped in and destroyed the tank's weapons before it had a chance to fire. From within the other Chimera, the infantry squad jumped out, hoping to get some shots off. However, the Tyranids were faster once again, and the Genestealers and Hive Tyrant ripped the entire squad apart. The Leman Russ managed to nuke one of the Zoanthropes, but overall the Guard flank was taking a beating.
The Crusader, Land Speeders and bikers all opened fire at suitable targets, killing the Carnifex and thinning the Genestealers, but they could not stop halt the charge. The Genestealers raked at the heavy tank with their rending claws, managing to damage its tracks and rip off its storm bolter.

Things get up close and personal

Things get up close and personal

Yet another Carnifex entered the area, charging straight towards the Land Raider to join the Broodlord and the remaining Genestealers. The Tyranids clawed at the tank but could only inflict a little more damage.
Flying Warriors dropped down in to the ruins and poured down deathspitter fire that pattered harmlessly off the Imperial Guard tanks. With enemies all around, the three Chimeras gunned their engines and tried to run down the surrounding broods, but all of their targets dodged aside except for one Termagant that disappeared under the tracks of the tank. As one Chimera went through their ranks, the Tyranid Warriors savaged it with their rending claws, wrecking it and forcing the Guardsmen inside to jump clear.
The Leman Russ opened fire with its plasma weapons and turned the Hive Tyrant threatening it to mush, but another Hive Tyrant soon appeared, looking to join the fight near the objective ruin. The Leman Russ was then set upon by Genestealers that damaged its targeting equipment but could do nothing more.
In the objective ruin, the jump pack squad took more casualties from the attacking Tyranids, but with the charging Berserkers, the Bringers Of Death were able to kill the Trygon and the remaining Lictors. But once again, another Trygon appeared heading for the ruin, while more Lictors jumped out to attack the Imperial Guard tanks.

The Tyranids pile on

The Tyranids pile on

Though they had temporary control of the objective ruin, with every single transport vehicle destroyed or damaged, and more and more Tyranids closing in from all sides, it became clear to the allies that there was no way to retrieve the equipment. After six turns, the mission had failed.